Blog

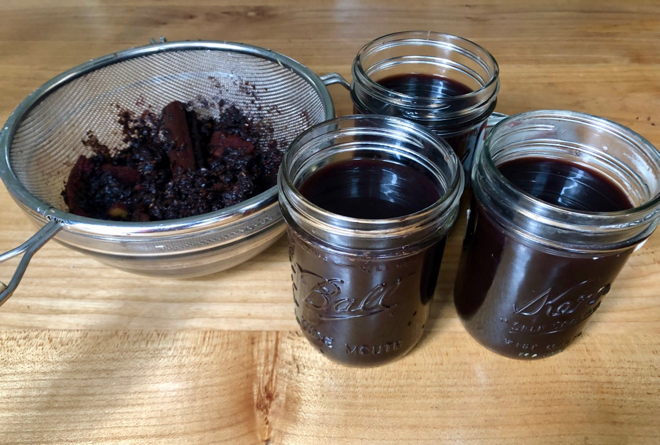
Elderberry Juice

I grew up drinking elderberry juice (Holunder saft) in Germany in the winter time to help with my persistent coughs and colds. I hated it. My mother made it and I don’t think strained it very well and it was gritty and bitter and awful.


Fast forward 35 years and I make it myself and love it. I make it from dried elderberries this time of year when colds are lurking around every corner. Supposedly elderberry juice, extract, tinctures and capsules activate our immune system and reduce symptoms of common cold and flu. I love the taste and somehow am comforted by it even though I disliked it so as a child. I also make it with cinnamon, ginger and a little lemon and honey so the pronounced elderberry flavor is balanced out a bit. You can buy all these elderberry products but making this juice is pretty simple and much less expensive. Some stores and co-ops sell bulk dried elderberries or you can order them online.


Elderberry Juice


Yields 3 pints


3/4 cup dried elderberries
1 1/2 quarts water
4-5 slices fresh ginger
1 cinnamon stick
2 thick slices of lemon (including peel)
1/3 cup honey


Put everything except the honey in a saucepan. Cover and bring to a gentle boil. Turn down and simmer, partially covered for 40 minutes. Let cool for about 30 minutes. Stir in the honey, strain the juice and pour into jars, leaving plenty of head space. Freeze 2 of the 3 jars and keep the third on in the fridge.


I add hot water to about 1/4 cup of juice and drink like tea or sip a little of the juice cold.


Fun with Food & Give me 30 Seconds & I’ll Give You 30 Days!

6pm rolls around these days and dinner happens and it’s good and we all are nourished but I haven’t found the time for real fun in the kitchen for a bit. My hope is to make this fabulous concoction at least once in the next few weeks. It’s simple to prepare but takes 2 hours to bake. That roasting pumpkin smell though and the whole, beautiful, glistening orb stuffed with whatever you want really, is just fun. Use rice instead of bread, add lots more herbs or meat or mushrooms or whatever strikes your fancy.


And speaking of fun, tell me why you cook. For fun? To de-stress? To have control over what you eat? I’ve created a super quick survey and I want to know how and why you cook. Give me 30 seconds of your time (to fill it out) and I’ll give you 30 days free access to the Seasonal Recipe Collection, just in time for Thanksgiving.


Thank you! And happy cooking and happy Thanksgiving.


Pumpkin Stuffed and Roasted
–adapted from Dorie Greenspan’s Around my French Table


1 pie pumpkin, about 4 – 5 lbs (just adjust the amount of filling if your pumpkin is smaller or larger – though you don’t want to go too much larger as it takes awfully long to cook)
Salt and freshly ground pepper
1/3 lb (or slightly more) stale bread, sliced and cut into ½-inch chunks
1/3 lb cheese, such as sharp cheddar, Gruyère, Emmenthal or a combination, cut into ½ chunks or grated
2-4 garlic cloves (to taste), finely chopped
2-4 slices bacon, diced and cooked until just crisp (optional)
¼ cup chives or sliced scallions (green onions), thinly sliced
2 teaspoons fresh thyme, minced or 1 1/2 teaspoons dried
1-2 tablespoons chopped fresh parsley
½ cup of cream or half and  half
½ cup milk
¼ teaspoon freshly grated nutmeg


Preheat oven to 350F.


You can using a baking sheet, a pie pan (as seen above), or a dutch oven with a diameter that’s just a tiny bit larger than your pumpkin. If you bake the pumpkin in a casserole, it will keep its shape, but might stick to the casserole, so you’ll have to serve it from the pot which is fine too.


Using a sturdy knife, cut a cap out of the top of the pumpkin. Cut a big enough cap that it’s easy to hollow out the inside. Scrape out the seeds and strings from the cap and the inside of the pumpkin. Rub the inside of the pumpkin generously with salt and pepper and put it on the baking sheet, pie pan or in a pot.


In a large bowl toss the bread, cheese, garlic, bacon, if using, and herbs together. Season with pepper and salt and pack the filling into the cavity. The pumpkin should be well filled—you might have a little too much filling, or you might  need to add to it. Stir the cream, milk and nutmeg with a bit of salt and pepper and pour it into the filled pumpkin. You want the liquid to come about half-way up the cavity. It’s hard to go wrong though. Better a little wetter than too dry.


Put the cap in place and bake the pumpkin for about 2 hours—check after 90 minutes—or until everything inside the pumpkin is bubbling and the flesh of the pumpkin is easily pierced with the tip of a knife. Remove the cap for the last 20  minutes or so of baking to brown the top and let any extra liquid evaporate. Transfer carefully to a serving platter if you baked it on a sheet. Serve, scooping out plenty of pumpkin with each serving or serve it in slices.

Have Quince? Make This! (Apples and/or Pears would also work)

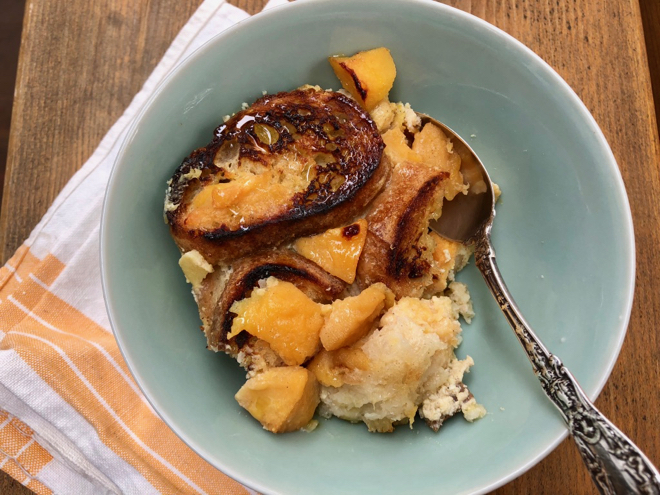
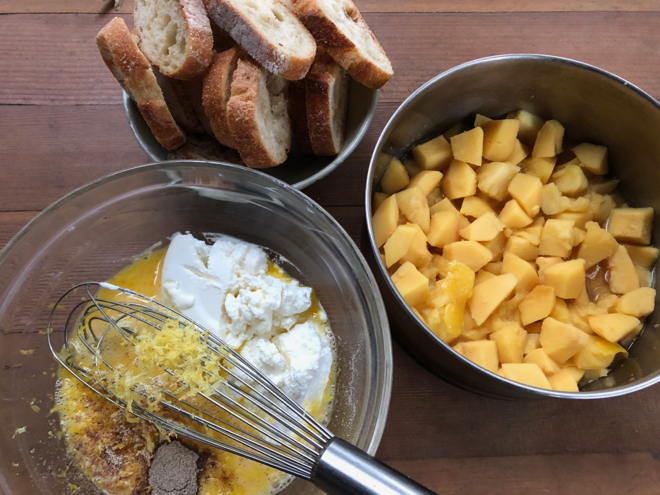
A bunch of leftover-sliced baguette, a bit of ricotta and a bowl of quince turned into this magic yesterday. The idea for this cook-with-what-you-have Ofenschlupfer (say that five-times in a row, quickly:) came to me as I was biking home from a bi-monthly breakfast I cook, with said leftover baguette in tow. Ofenschlupfer is a German variation of bread pudding and I grew up eating it in the fall made with apples. But quince! Quince, with all their tart, fragrant, wonder take this to another level. I just had a bowl of it for lunch. I could not help myself!

I tossed this together without referencing any Ofenschlupfer recipes but the basic combination of egg, milk, sugar, spices, bread, and fruit is pretty forgiving and you could just as easily dice stale bread instead of keeping the slices whole, substitute apples and or pears (bosc or other variety that will holds its shape when cooked) and change up the spices. But do be on the look-out for quince!

The cook with what you have philosophy of using what you have, combining things creatively for maximum flavor and fun in the kitchen is at your finger tips through the Seasonal Recipe Collection. Imagine getting ideas for any vegetable or herb you have on hand! Subscribe, if you haven’t already! Use discount code FALL for 20% off the already reasonable price for just $3.99/month or $39/year!


Quince Ricotta Ofenschlupfer (Bread Pudding)


For the quince:

4 medium quince, cored and peeled and cut into chunks (quince are very hard and this takes a bit of doing but it’s worth it, I promise)

2 strips of lemon peel (use a vegetable peeler)

2/3 cup water

1/3 cup sugar


For the custard:

3 large eggs

1 cup (whole) milk

2/3 cup ricotta (that’s what I had leftover–you could add up to 1 cup for a slightly richer version)

Zest of half a lemon (or whatever you didn’t use for the quince), finely grated

1/2 cup sugar

1/4 teaspoon ground nutmeg

1/2 teaspoon ground cardamom

1/2 teaspoon cinnamon

Couple pinches salt


8 ounces sliced bread/baguette (nothing too whole wheat or dense here)

Butter to grease the pan

2 tablespoons butter, cut into small pieces

2 tablespoons turbinado (or regular granulated) sugar


Preheat oven to 350


Put the quince, strips of lemon peel, 1/3 cup sugar and water in a saucepan and bring to a simmer. Cook gently, covered, for about 7-10 minutes until the quince are just tender but still holding their shape. The time may vary a bit depending on your quince but check often since some turn to mush quickly.


In a medium bowl whisk the eggs with the milk, ricotta, grated lemon zest, spices, sugar and salt.


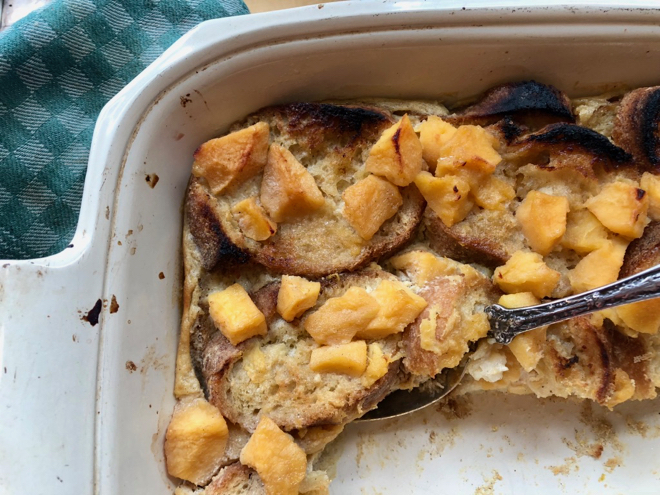
Generously butter an 8 x 13 or comparable baking dish. Put a single layer of bread in the dish. Pour half the custard over the bread and top it with half the quince. Repeat with the remaining ingredients, finishing with quince and drizzle any liquid from the quince over the top. Gently press down on the whole thing to make sure the bread is soaked. Dot top with butter and sprinkle evenly with the sugar. Cover tightly with foil and bake for about 30-40 minutes, but check a bit earlier, until the custard is almost set. Remove foil and bake until set, finishing under the broiler for a little more browning. Serve hot or warm for dessert or breakfast, lunch or dinner!


Cooking With What You Have (No Matter Where You Are)

People love the cook! This is I think why I started cooking when I was quite young. My mother suffered from migraines and when she was out of commission I started cooking for my family. The house was a sad place when my mother was sick and I hated it. My only fond memories of those times were when my brothers and father liked the food I made and told me so.


I just returned from a few days in Mexico with 8 friends. I hadn’t planned on cooking the majority of our meals but once there, I couldn’t help myself. The loveliest sous chefs and the rousing appreciation made it a joy.


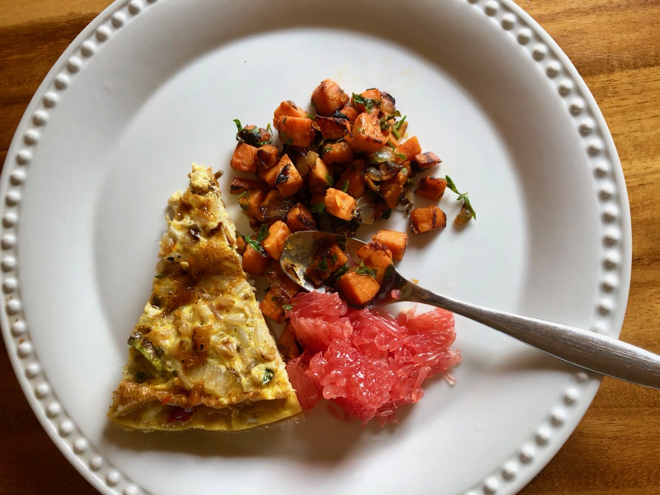
We were in a house that was stocked with nothing but salt, some ancient looking bouillon powder (which lead to an excellent risotto btw), cinnamon and black pepper. A stop at a local grocery store for oil, butter, fresh produce and herbs, rice, eggs and tortillas and chicken (superb chicken with the most beautiful yellow fat) set me up. The local fish market rounded things out. I cooked day after day, each morning a frittata repurposed the leftovers from the night before. I didn’t miss my very-well-stocked home pantry.  It was a much-needed reminder of how little we need to nourish ourselves well (if we have the means to purchase basic ingredients, that is); how very versatile a frittata is; that people (at least this group) are perfectly happy eating the same (template) dish day after day; and the joy of being creative with what you have!


Frittata (template)

You can start from scratch of course and sauté some onion, add some vegetables and then cover with barely beaten eggs with or without cheese and cook (on the stove top and then finished under the broiler) until set. Or you can heat up leftovers–already cooked vegetables, rice, pasta, meat, etc. and then top with egg, cheese, herbs, etc.


On this trip I repurposed leftover rice pilaf that originally included poblano peppers, onion garlic and cilantro. Another day it was a sweet potato hash seasoned with lots of lime juice and cilantro and another it was leftover roasted chayote and zucchini and bacon. The sky is the limit, just don’t over beat the eggs–really just break them up, don’t skimp on the salt and try not to burn it under the broiler! And let it cool for a bit before eating. Frittatas are much more flavorful warm or room temp, than piping hot.


Happy cooking!


Want to get more comfortable cooking like this, using what you have with confidence and creativity? Subscribe to the Seasonal Recipe Collection for 20% off with discount code FALL!

Green Sauce or “Going-out-of-Town” Sauce

If you love vegetables (and herbs) and/or you have a CSA or shop at the farmers’ market or have a vegetable garden, chances are you have pangs of guilt or sadness when you’re getting ready to leave town for the weekend and there’s beautiful produce in your fridge that may or may not last until you get back.


Over the last few years I’ve found myself making herb sauces, pestos and ratatouille before I leave town in late summer. Whether you’re going camping, staying with friends or booking a room somewhere, these things all travel well and improve anything they touch and are good at room temperature. They also are just delicious and need nothing but crackers to be consumed–as I recently did at a soccer tournament in a hotel lobby. Fellow soccer parents were thrilled with the spread!


I realize most folks are probably not in the habit of cooking right before leaving town but it may turn into something you do. Coming home to rotting vegetables/herbs is no fun and enjoying the fruits of that extra time spent before heading out may just be worth it.


I just made this sauce and it’s going to Walla Walla with us later today and it will grace the sandwich I pack for myself for the road.


P.S. If you’re tired of wasting produce and want more tips and tools like this subscribe to the Seasonal Recipe Collection and take control of that crisper:)!


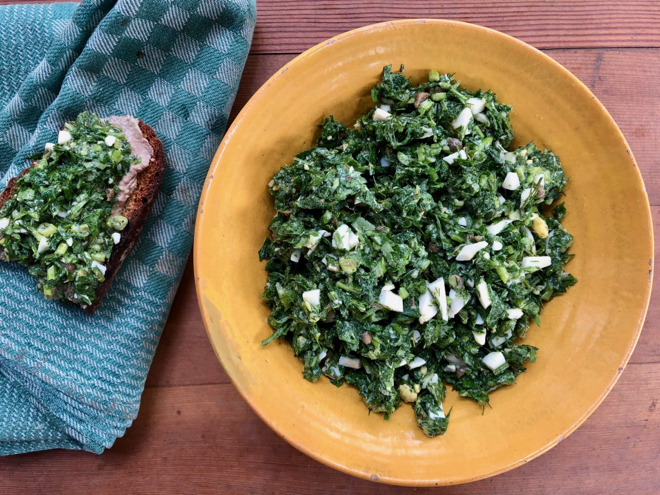
Green Sauce


There are many variations for this herby sauce that improves anything it touches. It is a bit richer and more complex the than Italian-style salsa verde I make frequently. I particularly like this herb combination (parsley, tarragon, dill) but play around with different ratios and herb combinations including basil and mint, if you’d like. The above version employed cilantro, parsley and dill.


You can chop everything by hand (as I did above) or process in a food processor, it will be saucier/looser if you process and I kept the above version a bit drier (less oil) so I could use it as a sandwich spread as well. I usually use the processor but my knives had just been sharpened and it was a joy to chop all those herbs!


This makes a lot of sauce but I doubt you’ll have trouble finding ways to use it.  It is particularly good with poached, baked or roasted fish, boiled potatoes and/or carrots, turnips, summer and winter squash, etc.


1 good-sized bunch parsley, washed and stems cut off where the leaves begin

1/4 cup tarragon leaves

1 good-sized bunch dill, picked and tough stems discarded

2 green onions, chopped (or 2 tablespoons regular onion or shallot)

1 tablespoon capers, rinsed

3 anchovy filets

2 hard-boiled eggs, yolks and whites divided

Juice of 1 1/2 – 2 lemons (to taste)

1/2 cup or more olive oil

Sea salt and pepper


In a small bowl crumble or mash up the eggs yolks a bit and finely chop the whites. Process (or chop by hand) the herbs, onions, capers, and anchovies and yolks in the food processor until finely chopped.  Add the lemon juice and start adding the oil through the feeding tube and process briefly.


Taste and add salt and plenty of freshly ground pepper. Add lemon juice or oil to taste and to create a fairly loose sauce. I like my sauce quite lemony. Finally put the sauce in a bowl and stir in the chopped, cooked egg whites.

Zucchini Cake with Crunchy Lemon Glaze

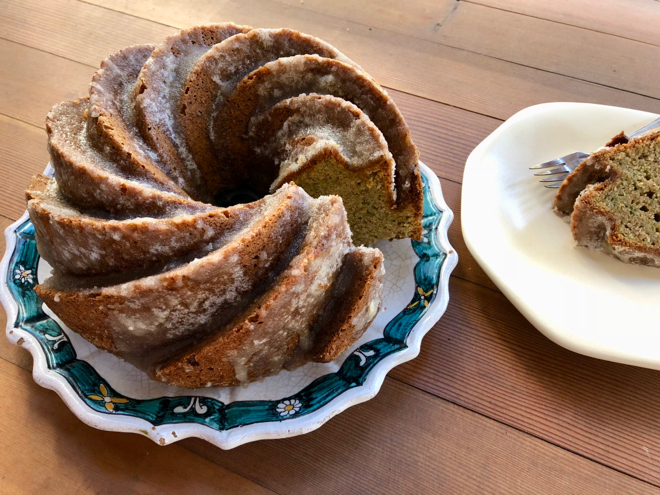
Let’s be honest, if we really want to use up a lot of zucchini we should make ratatouille or zucchini fritters or myriad other savory dishes that can be the centerpiece of a meal. Zucchini bread/cake does not really use up that much, or maybe I just don’t have the right recipes. However, this cake that David Lebovitz wrote about years ago, is worth making, and it uses 3 small-medium zucchini, which made a small dent in my backlog of zucchini, and is just so delicious it might as well be the centerpiece of a meal!


This recipe is fabulous as written but I’ve edited it slightly:

  • reduced sugar by a 1/4 cup
  • added zest of 1 lemon to batter
  • squeezed the grated zucchini out, just in large handfuls over the sink, and used a total of 350 grams (about 4 cups, packed) instead of his 300

Happy baking!

Make Your Own Rules! Aka You’re the Boss & Cooking is More Fun that Way

I just returned from a 4-day camping trip/music festival. First day back was busy and hot. No time for a trip to the store and there was a hungry family to feed & we spent too much money on food at the festival:


What did I have on hand?

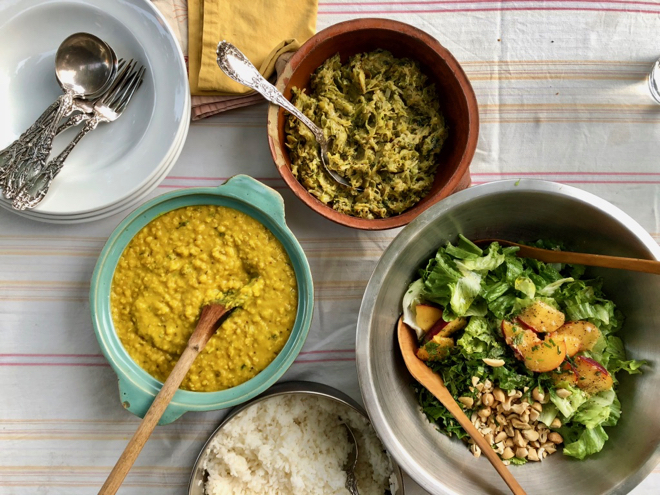
1 giant zucchini that I should have picked before I left. 1 slightly shriveled peach, 1 quart of cooked rice in the freezer as well as a loaf of bread, a head of lettuce that still had a decently fresh core, plenty of herbs in the garden, red lentils in the pantry, plus 1 onion and a few cloves of garlic, a bit of butter, spices and a can of coconut milk. And a handful of roasted, salted cashews.


The Menu:

Zucchini & Herb “Butter” + Toasted Bread

Red Lentil Dhal & Rice w/ Plenty of Mint

Green Salad w/ Peaches, Mint & Cashews


The Verdict:

Delicious + enough for lunch the next day + cooking without spending an (extra) dime makes me very happy


My “Rules” (for this meal):

  • Don’t hesitate to serve an Indian-inspired dish next to a French-inspired one next to an undefinable salad
  • Rich nuts like cashews can stand in for cheese in salad
  • Nuts are critical pantry staples
  • Grating the zucchini and squeezing out some of the liquid before sauteeing it makes it cook more quickly and have a better consistency
  • A zucchini that looks too big to be good can be delicious sauteed with plenty of butter & herbs
  • Grating vegetables is easy and often leads to creative uses
  • Growing a few herbs pays off big time
  • Fruit is wonderful in green salads
  • Butter & salt make everything better

What are you cooking on the fly these days?


Happy summer!


P.S. Need more regular tips and inspiration to eat well and spend less? Use discount code SUMMER for 20% of a subscription to the Seasonal Recipe Collection. 


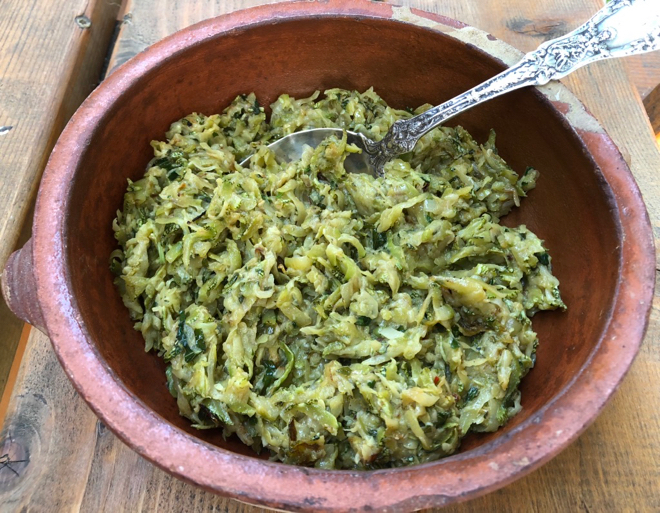
Summer Squash Herb “Butter”

–inspired by Food52.com


Whenever you have a lot of squash this is the prefect thing to do. Grated, it cooks down quickly, turning into a sweet and savory side dish or spread. Spread it on toast in place of actual butter or add a thick layer in a sandwich with  tomatoes and/or soft cheese. You can use it as a pizza topping or a pasta sauce too.


Serves 4 as a side, 2 as more of main with an egg or a hearty salad, etc.


About 4-5 medium zucchini or any kind of summer squash (feel free to use less or add extra — cooking times will vary)

1/4 cup olive oil or butter (I prefer butter in this one)

½ a medium onion, minced

2 tablespoons chopped fresh oregano, mint, basil or parsley

Salt and freshly ground pepper

Squeeze of lemon juice or drizzle of vinegar


Coarsely grate the squash on the large holes of a box grater. Squash is really the easiest thing to grate so it won’t take much time at all. If you feel like it you can sprinkle the pile of grated squash with a little salt and let it sit while you sauté the onions. Even in just a couple of minutes it will release a bit of liquid. Before adding the grated squash to the pan you can then squeeze handfuls of the squash over a sink to release some extra liquid which will speed up the cooking a bit. But don’t worry if you don’t–it will be just fine.


In a deep skillet, heat the olive oil/butter. Sauté the onion for about 3 minutes on medium heat. Add the squash and a few generous pinches of salt and toss and cook and stir over medium to medium-high heat until the squash is nice and soft and almost spreadable, about 15 minutes. If you scorch the bottom, turn the burner down a bit but don’t worry about the browned areas. They will add flavor and be sure to scrape them up and reincorporate. Just before the end of the cooking time add the herbs and incorporate well. Cook another minute or two, taste and adjust seasoning with salt and pepper and a little lemon juice—you don’t need much but just a little brightens it up nicely.


Quick, Easy, Delicious, No Custard Ice Cream

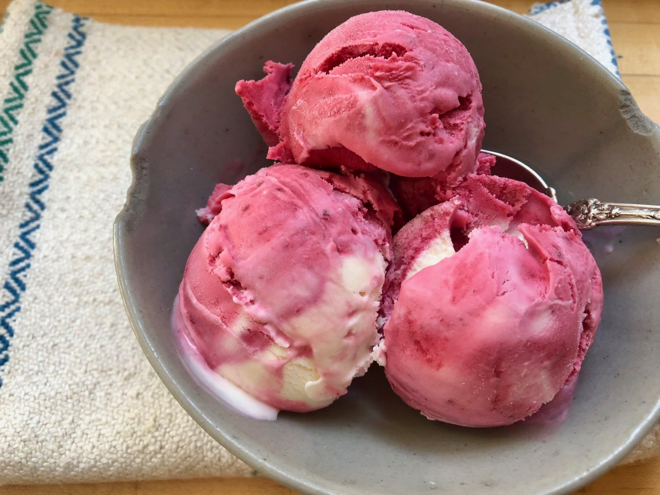
Ice cream made with boysenberry jam and yogurt and cream.

It’s hot here in the Pacific Northwest! I have an ice cream maker that doesn’t get enough use. No more of that silliness! I’ve just made 2 batches in 2 days. No custard, no turning on the stove to even infuse the cream/milk/yogurt. I’ve also been making jam lately and jam is an easy way to flavor ice cream–particularly if you want to reduce the number of steps and improve texture. Fresh fruit has lots of moisture and does not have as concentrated flavors.

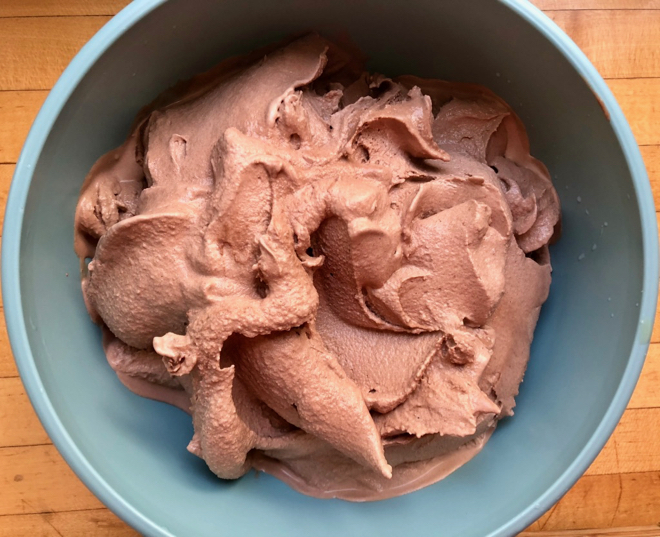
The formula works well for chocolate ice cream too.

Chocolate ice cream with cream, milk, yogurt & cocoa.


Fruit Jam Ice Cream with Yogurt
–Yields about 3 cups


1 cup heavy cream
1 cup plain, whole milk or Greek yogurt or 1/2 cup whole milk & 1/2 cup yogurt–see headnote)
scant 1/2 cup sugar (if your jam is quite sweet you can use a bit less sugar–my jams tend to be quite tart)
2 teaspoons vanilla extract (if you make your own you can use more–I used 1 tablespoon of my vodka-based vanilla)
1/2 -2/3 cup jam of your choice (I used a seedless boysenberry jam here)


Thoroughly whisk cream, yogurt, sugar and vanilla together in a medium bowl. The sugar should dissolve pretty quickly. Set this mixture in the freezer for 15 minutes if you have the time. Pour the cream mixture into an ice cream marker and turn on. When it’s fairly thick–takes about 25-30 minutes in my machine–add the jam and swirl it in until it’s partially mixed in (if you like the swirled look above) and turn off the machine. Scrape the ice cream into a container and freeze for a couple hours or more or enjoy as is, in a soft serve state!


Chocolate Ice Cream
–Yields about 3 cups


Scant 1/2 cup sugar
1/4 cup cocoa powder (unsweetened)
1 cup heavy cream
1/2 cup plain, whole milk or Greek yogurt
1/2 cup whole milk
Pinch or two sea salt
2 teaspoons vanilla extract (if you make your own you can use more–I used 1 tablespoon of my vodka-based vanilla)


Thoroughly whisk cocoa and sugar in a medium bowl. Add cream, yogurt, milk and vanilla and whisk until combined. The sugar should dissolve pretty quickly. Set this mixture in the freezer for 15 minutes if you have the time. Pour the cream mixture into an ice cream marker and turn on. When it’s fairly thick–takes about 25-30 minutes in my machine, scrape ice cream into container and freeze for a couple of hours or more or enjoy as is, in a soft serve state!


Eat More Fava Beans: Skip the Peeling & Sometimes Even the Shelling

Fresh fava bean season is in full swing in the Pacific Northwest. These last few weeks of school are also a particularly busy time which may have something to do with why I can’t be bothered to peel each individual bean. And when tender and small enough I just prepare and eat the whole pod. Italians, who know a thing or two about enjoying fava beans, often don’t peel them. So I’d like to make the case for more fava bean consumption this spring with less hassle.


If your beans are on the larger side, there’s always an Iranian method of cooking them–the whole pods are cooked in heavily salted water until they start falling apart. The resulting beans are tender and well seasoned and do not need peeling. So there! Skip the finicky peeling, enjoy the beans and more nutrients to boot!


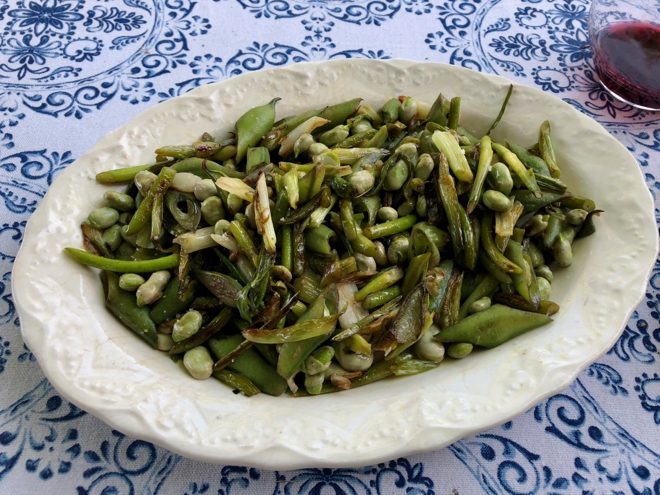
Seared Young Fava Beans with Garlic Scapes and Lemon

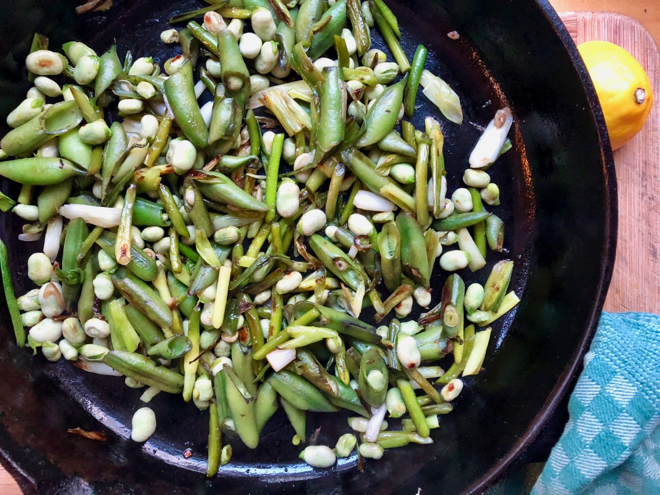
In this dish I shelled some and left most in the pod and just cut them into bite-sized pieces. The combination of shapes and textures was delicious.

When you have young/small fava beans you can eat the whole pod, either grilled or just seared in a heavy skillet, in this case alongside some shelled ones and garlic scapes and scallions. The whole pod gets tender and when well seasoned with salt and lemon, is just delicious. You can cook them all whole or shell a few for contrast and fun-either way is delicious.


Serves 4


2 tablespoons olive oil
1 1/2 lb young, tender fava beans in their pods
1 bunch garlic scapes, cut into 2-inch lengths or 2-3 the stalks green garlic or 1 head new garlic, minced
3-4 scallions, cut into 2-inch lengths (optional)
Salt
Juice from 1/2 lemon


If you have time, shell 1/3 of the fava beans and cut the remaining whole pods into 2-inch lengths. The combination of the shelled and whole favas is fun but not necessary, see headnote.


Heat olive oil in a large, heavy skillet over medium-high to high heat. Add the fava beans in their pods (if you shelled some you’ll add those a few minutes later), the garlic scapes and scallions, if using, sprinkle with salt and cook, covered and undisturbed for a few minutes. When they start browning give them a stir and continue cooking, stirring often, for about 3-4 more minutes. Add the shelled fava beans and cook for another couple of minutes. When the pods, beans and garlic scapes are tender remove from the heat. Taste and adjust with salt if needed and a generous squeeze of lemon juice. Serve hot or warm.

Creative Use for Jams & Compotes to Make Room for the New Harvest

Do you have jars of jams or fruit compotes or syrups that you made or were given that are getting dusty on she shelf? Now’s the time to work through those so you can make room for the rhubarb, berries and stone fruits that will be here before we know it.


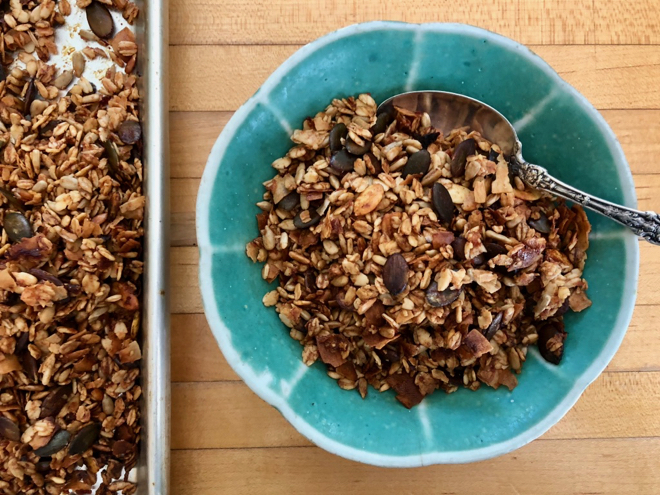
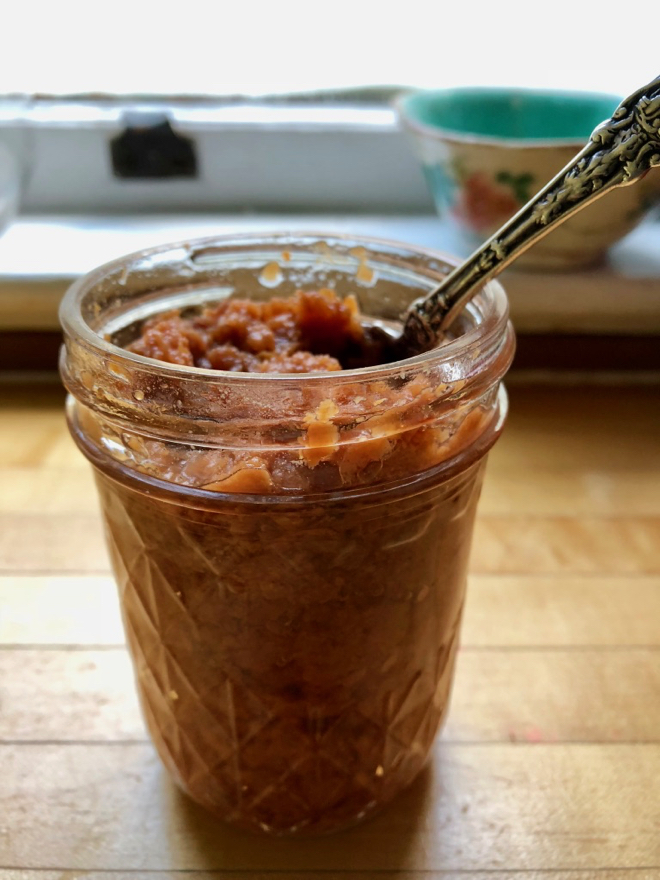
This week I added a jar of quince compote/jam to my batch of granola. It added a bit of sweetness and a subtle tang. You can still make this granola without the jam/compote. It’s delicious and just lightly sweet. 

Seed & Coconut Granola


If you’re not using any jam/compote, increase the oil to 1/2 cup and increase the honey to 1/4 cup.


5 cups  rolled oats
1 1/4 cups raw pumpkin seeds, hulled
1 1/4 cups raw sunflower seeds, hulled
1 1/2 cups coconut chips (also called flaked coconut)
1/2 pint of jam or fruit compote/apple sauce (see headnote)
1/2 cup maple syrup or liquid sweetener
2 tablespoons honey
1/3 cup olive oil
1 1/2 teaspoons cinnamon
1 1/2 teaspoons fine sea salt or kosher salt


Preheat oven to 325°F.

Place dry ingredients in a large bowl and mix until well combined. Mix honey, maple syrup, olive oil and jam/compote in another bowl or warm in a saucepan if your honey is very stiff, and then stir into dry ingredients. Spread granola mixture in an even layer on two rimmed baking sheets. Transfer to oven and bake, stirring every 10-15 minutes, until granola is toasted, about an hour. It should be nice and golden brown. Remove granola from oven and let cool completely before serving or storing in an airtight container for up to 1 month.

CSA Vegetables, Recovery & a Delicious Slaw

With my gorgeous winter share from 47th Ave Farm. Photo credit Shawn Linehan Photography

Enjoy and love your vegetables! We’re told to eat our vegetables, all the time. We tell our children to eat their vegetables. But I think we sometimes forget the sheer pleasure and goodness of in-season vegetables, year-round. And yes, good health, is a big bonus!


It has been a tough winter for bugs of all sorts. Most everyone I know has battled several rounds of colds, flus, and other unpleasantries. Our little family of three has been practically unscathed. It has also been a big winter for vegetables. I’ve had the pleasure (and responsibility:) of two, full Winter CSA Shares (I’m guessing that’s 20lbs/week). I don’t have any proof that it’s all the black Spanish radishes, daikon, celeriac, leeks, turnips, kale, collards, purple sprouting broccoli, cauliflower, cabbage, winter squashes of all shapes and sizes, and loads of onions, carrots and garlic, but I’d put money on my remarkable health and vitality these days having something to do with this pleasure and plethora of vegetables.


I’m just over a year out from a double mastectomy and six months of chemotherapy that laid waste to my immune system. However, when these gorgeous, nutrient dense, vegetables show up every week and the sheer volume allows you to eat as many vegetables as you possibly can, my immune system seemed to rebuild with gusto. I know I am very fortunate to have access to this bounty and everyone should be so lucky!


Most of us will hopefully not experience a health crisis of these proportions but we are all susceptible to stress and illness at every turn and what we choose and have access to eat, will make an impact. CSAs are one way of insuring a regular supply of truly seasonal produce. There’s something about this regularity that slowly builds habits that sustain and nourish not only our bodies but a better understanding of our communities, our soil, the people who cultivate it and share the fruits of their labor with us. I have never been more in love with the CSA model and more convinced that it is an antidote to so much of what ails us.


There’s still plenty of time to subscribe to a CSA and you’ll get access to all the recipes I’ve developed cooking my way through CSA shares for more than a decade in the form of the Seasonal Recipe Collection if you subscribe to one of these farms! But no matter what farm, just give it a shot, especially if you don’t travel much. Being home to enjoy all the bounty is one of the keys to CSA success.


Happy spring!


47th Ave Farm  — Minto Island Growers — Love Farm Organics — Full Cellar Farm — Mud Creek Farm  — Laughing Crow Organics — Hill Family Farm — Farmer Joe’s Gardens — Olsen Communities CSA — Cully Neighborhood Farm — Full Plate Farm — Coyote Family Farm — Abundant Field Farm — Sweetland Farm — Backyard Gardens — Legacy Acres Farm — Tanager Farm — In Good Heart Farm — Sweet Digz Farm — Lewis Educational Agricultural Center (L.E.A.F) 


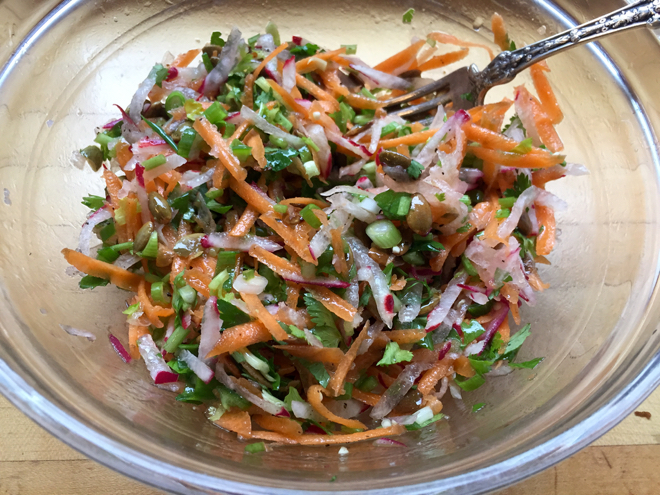
Radish & Carrot Slaw w/ Toasted Pumpkin Seeds

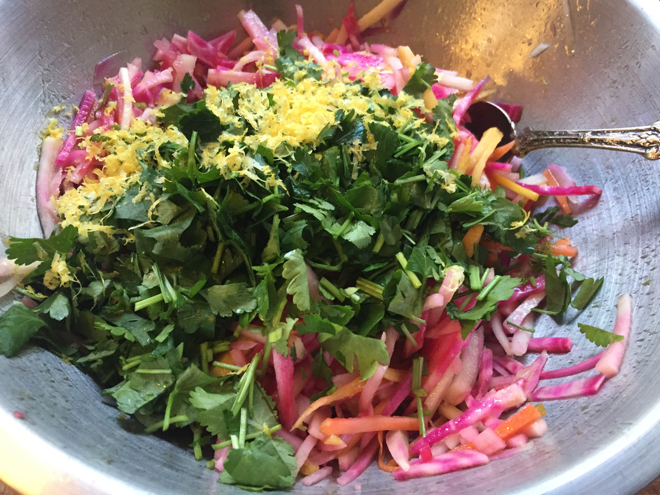
This is gorgeous, bright, tart and crunchy from the seeds. It’s delicious as a salad as well as on toast with hummus or avocado or cheese or egg, in some form. It will enliven most anything, really.


Serves 4


2 medium carrots, grated on large holes of a box grater
1 1/2 – 2 cups grated radish, of most any kind: Watermelon, Black Spanish, Ostergruss or common little red ones
1/3 cup chopped fresh cilantro or parsley or a combination
2 scallions, thinly sliced, white and green parts
1/2 serrano chile (optional), minced or a few pinches red pepper flakes
1/2 cup toasted pumpkin seeds (toast in a 350 degree oven for 8-12 minutes until turning golden and a bit puffed or in a dry skillet over medium-low heat)
1 1/2 tablespoons cider vinegar
2 tablespoon olive oil
Salt and pepper, to taste


Toss all ingredients in a bowl. Taste and adjust seasoning with more vinegar, salt, pepper to suit your taste. Enjoy fairly soon if you want to enjoy the full crunch!

Possibility

Some family and friends spent the morning of New Years Eve making these delicate, shape-shifting, ephemeral bubbles in the brisk, breezy, sunny air. We exclaimed and laughed and shouted, bubble after bubble, as they drifted or popped immediately or divided and continued on their short path to the pavement or a tree branch. There’s something about the joy and unpredictability of these spheres that seems worth pondering as we head into another year.


A few conversations, articles and books are also shaping my thoughts for this new year. A friend shared her thoughts about simplifying her pantry staples, I mean really simplifying, beyond what I can yet properly imagine, and challenged me to ponder the same and create food, delicious, nourishing food, everyday, with less.


I just read this piece about Tanya Berry, Wendell Berry’s wife, editor, soulmate which gave me much to ponder including this quote of hers: “You have to quit being so picky, and so fault-finding, and so snotty about it. You take people and their gifts, and you enjoy them and honor them.” 


And finally this, hope-giving story about a man who plants trees.


Happy New Year all you wonderful people!


P.S. Heres’s one of my favorite things to eat at the moment:


Carrot and Seed Salad with Herbs
–inspired by Breakfast Lunch Tea by Rose Carrarini


3/4 cup sunflower seeds (or pumpkin seeds)

2 teaspoons oil & few pinches salt (to toast the seeds)

6-7 medium carrots, grated

1/2 cup (or more) chopped fresh herbs like chives, parsley, mint, cilantro etc.

Dressing:

3 tablespoons lemon juice, more to taste

scant 1 teaspoon sea salt, or to taste

1/2 teaspoon ground black pepper

3 tablespoons olive oil

Preheat oven to 350.


Toss the sunflower seeds with the a little oil and several pinches of salt and toast on a baking sheet for about 12 minutes, turning occasionally, until they are crisp and golden. Set aside to cool.


Place the grated carrots in a serving bowl with the herbs and the dressing ingredients. Toss well and add toasted seeds and taste adjust seasoning with more lemon and/or salt, if needed.

Chocolate Pie

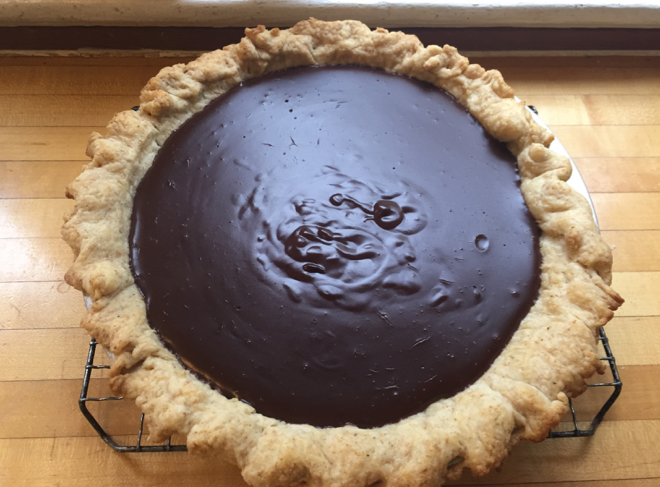
Years ago my friend Margo had a piece of my mother’s chocolate pie I had hauled home from Thanksgiving. It was at least three days post Thanksgiving and custard pies do make the crust soggy eventually, but no matter. She was an instant convert and inquires about any leftovers annually. It’s still a winner and I actually kind of relish the slightly soggy, day-after (or day two or three-after) pie. My version is a bit more chocolatey than my mother’s but it’s still has that nice, pudding-y lightness to it. Oh I just can’t wait for next week!


Wishing you all a very happy, delicious and peaceful Thanksgiving!


Chocolate Pie


My mother has been making a version of this pie for decades, as did my grandmother. It’s not very sweet (only 1/3 cup sugar in the whole thing) and nice and chocolaty. It really does come together quickly and it’s always a favorite at the Thanksgiving table, and the day after!


1 single crust pie, serves 8 +


½ a recipe of the below pie dough or your preferred dough


Filling:

1/3 cup cornstarch
1/3 cup plus 1 tablespoons sugar, divided
3 tablespoons unsweetened cocoa powder
1/4 teaspoon salt
3 cups whole milk
2 ounces bittersweet chocolate (about 60% cacao), finely chopped
1 teaspoon vanilla extract
1 cup chilled heavy cream


Roll out dough on a lightly floured surface with a lightly floured rolling pin into an 11-inch round, then fit into a 9-inch pie plate. Trim edge, leaving a 1/2-inch overhang, then fold overhang under and crimp edge decoratively. Prick bottom and side of shell all over with a fork, then chill shell 15 minutes in freezer. While shell chills, preheat oven to 375°F. Butter a piece of foil and press it butter-side down into the unbaked shell and cover the bottom with pie weights or dry beans.


Bake on baking sheet until pastry is set and edge is pale golden, about 20 – 25 minutes. Carefully remove weights and foil, then bake shell on baking sheet until pale golden all over, 15 to 20 minutes more. Cool shell.


For pudding filling, whisk together cornstarch, 1/3 cup sugar, cocoa powder, and salt in a 2-quart heavy saucepan, then gradually whisk in milk. Bring to a boil over medium heat, whisking constantly, then boil, whisking, for about two minutes (mixture will thicken). Remove from heat and whisk in chocolate and vanilla until smooth.


Pour filling into cooled shell and chill until cold, at least two hours. Just before serving, beat cream with remaining 1 tablespoon sugar until it just holds soft peaks. Spoon onto pie and garnish with bittersweet chocolate shavings, if you’re feeling fancy.


Pie, without whipped cream, can be chilled up to one day before serving. Whipped cream is best added at the last minute, however, it holds up pretty well even with the cream.


Basic Pie Crust
–adapted from ChezPim.com


I swear by this crust technique and ingredients—flour, salt, butter, water. It has an extra step but the results are worth it and after a time or two it becomes routine.


For flaky pastry dough; enough for two 9″ rounds, for top and bottom pie crust, or two tarts:


250 g (2 1/4 cup) all purpose flour or 100 grams whole wheat pastry flour and 150 grams apf
Scant ½ teaspoon fine sea salt (or use salted butter and skip the extra salt)
225 g (1 cup/2 sticks) cold butter (salted if you’d like and then omit the salt above)
60 ml (1/4 cup) cold water


Measure the flour and salt and dump it onto your clean countertop.  Cut the sticks of butter into slices ¼-inch thick and spread them out on top of your pile of flour. Toss the chunks so they are coated with flour.


Now, press the butter into the flour with the heal of your hand: the left one if you’re right handed, and vice versa. With your right hand holding the pastry scraper, scrape up some of the flour and butter and flip it over the pile.  Keep pressing and scraping until the butter becomes thin flakes pressed into the flour.  Keep working until you see more butter flakes than loose flour.  If your butter flakes are really big, break them up a little bit, you should end up with a combination of big flakes and some crumbs.


Make a well in the middle of the pile and pour the 1/4 cup of water into it.  Now, working quickly, use your finger tips or the bench scraper to gently blend and distribute the water evenly into the dough. Then, scrape up the dough again with the pastry scraper and press it into a somewhat cohesive lump of dough.  Gather it into a ball of sorts–it’s fine if it’s quite crumbly–and wrap tightly with plastic and let rest in the fridge for 20-30 minutes.


After 30 minutes, remove the dough from the fridge and unwrap it.  Flour the counter.  Place the dough on the board and lightly flour the top of the dough as well.  With a rolling pin, roll the dough out to an elongated rectangle. It will be crumbly and may only stick together in patches, which is just fine. Pick up one end of the rectangle, fold it 2/3 of the way in, as best as possible, again lots of crumbs are fine. Then pick up the other end and fold it over that section. Now you have a dough that is folded more or less into thirds.  The dough will crack and might even break, don’t worry about it.


Turn the folded dough 90 degree so that the seams are now on the sides, roll the dough out again into a rectangle, and repeat the folding again. You will see that the dough will become smoother and more pliable.  You can repeat this process once or twice more – I usually do it three times altogether.


What you’re doing here with the rolling and folding is working the dough a little bit to build the strength so that it is not so fragile when you roll it out later.  (Especially if you’re going to make lattice top, you’ll find this dough easy to work with.)  You’re also creating very thin layers or butter and flour, much like in puff pastry, so the dough becomes extremely flaky once baked.


Once you’ve done your three folds, or however many you want to do, roll the dough into a smaller rectangle. Cut it in half and shape the two resulting pieces roughly into rounds. Wrap with plastic wrap and refrigerate for up to 3 days or freeze, wrapped in a freezer bag, for 3-4 months.
 

The Thrill of a Good Template

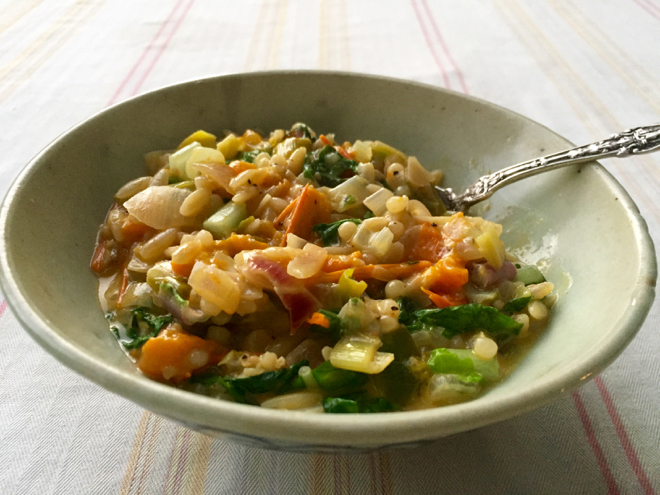
An unwitting smile creeps in as I stand at my counter chopping something or rummaging through my fridge or pantry as an idea for a dish takes shape. It’s the thrill of a new idea–an idea built on a tried and true method to feed whomever will be at the table. Often it’s one ingredient that triggers the plan. In the case of this bowl of pasta risotto with leeks, cherry tomatoes, etc. , it was a pint of the very last of the cherry tomatoes a friend shared. And it was a recent facebook post by a friend asking what to do with little bits of different kinds of pasta that had accumulated in his pantry. If you cook (especially small shapes) pasta, like risotto (minus most of the stirring) you get a deliciously creamy result and precise cooking times don’t matter since you’re not after al dente!


This Pasta “Risotto” Template is going to get a lot of play this fall. I can’t wait to see what other combinations surface. And please share your ideas or variations if you make it. I can imagine a Thai-inspired version with coconut milk as some of the fat and/or liquid and cilantro and hot peppers and maybe rice noodles instead of regular pasta though they might get too gummy. . . Oh the fun of experimentation!


Pasta “Risotto” Template


Since this a template it should go without saying that you can vary it to suit your needs and taste; different shapes of pasta, stock or broth rather than water, cheese/no cheese, cream/no cream, herbs, spices . . . What you need is some small pasta, vegetables, hot liquid and a bit of fat in one form or another.


Serves 4


1 1/2 tablespoons olive oil or butter or a combo

1 small onion, finely diced

1 leek, cleaned, halved lengthwise and cut crosswise into thin strips

1/2 teaspoon fresh thyme leaves or a little rosemary or sage or lots of parsley, etc.

1 pint cherry tomatoes or 1 1/2 cups canned, chopped tomatoes

1 cup orzo pasta (rice shaped pasta) or a combination of any very small pasta shapes. I used 2/3 orzo and 1/3 Israeli couscous in the above version

2 1/4 cups boiling water or stock or broth

2-3 cups finely chopped mustard greens, tender stems and all, or another tender green like spinach, beet greens, mizuna, turnip greens

1/2 cup grated Parmesan or other hard cheese, optional

1-2 tablespoon good olive oil or butter, to finish (to taste and optional)

Splash of heavy cream (optional)

Salt and freshly ground pepper to taste


Heat oil or butter in a large, heavy skillet over medium heat and add onions, leeks and thyme and stir well. Sprinkle with salt and cook for about 5-7 minutes until softened. Meanwhile heat up your broth or water. Add tomatoes to onions and cook for 3-4 minutes until beginning to fall apart. Add pasta and hot water/broth and stir well. Add more salt here, unless you’re using salty broth. Stir well and partially cover and turn down to medium low. Cook for about 7 minutes, stirring once or twice. Then add the greens and stir well and cook for another few minutes until greens are as tender as you’d like them and pasta is cooked. Stir in the oil, butter and/or cheese, if using. Taste and adjust seasoning with salt and/or pepper. Serve hot or warm.

Hands

Last night my 10-year-old son fell asleep holding my hand. I don’t know if he did this because he has a bummer of a cold or because my hand was just close by–I was sitting in a bean bag chair next to his bed. Before he fell asleep he asked if I could just bring my laptop in to his room and work next to him while he fell asleep. I started out working but then something made me put down the computer and then he took my hand.


One year ago today I wrote this post about how my illness forced some serious introspection and how I looked forward to keeping this newfound perspective once I was healthy again. As I’ve begun working more and socializing more and basically re-entering the world I stepped out of last summer, I’ve sometimes had a hard time living the changes I made over the last year. We live in a busy, busy world and staying mindful in and of each moment takes a lot of practice.


Those priceless 10 minutes, just sitting in the dark holding that sweet warm hand was all the reminder I needed, for the moment. . .

Even when you think you can’t . . .

I have a cold, not really a big deal but somehow it really wiped me out and got me down last night. On the heals of a year of cancer treatment it seems like a cold shouldn’t bother me at all and hopefully in the future it won’t, but yesterday, it did. I guess I feel like the universe owes it to me to feel great now!

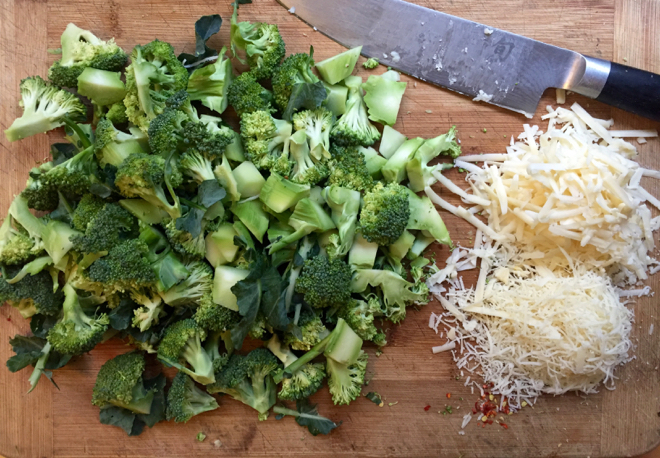
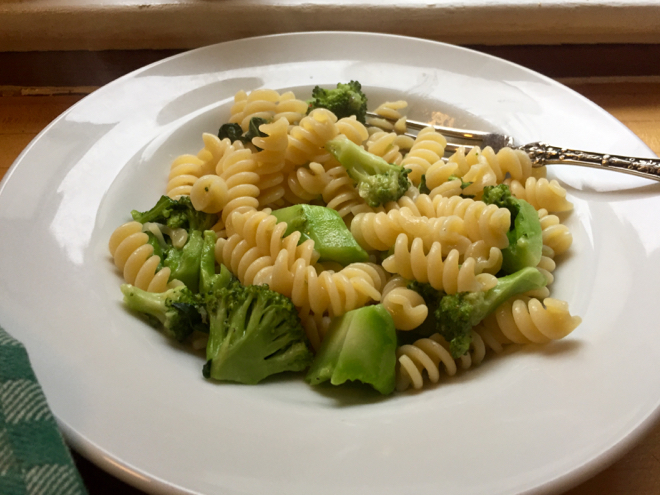
In my woe-is-me mode I wondered what I would feed my always-hungry family who’s return from work/soccer was imminent. Earlier in the day I had chopped up some broccoli so I had a start. When pondering just getting slices of pizza from the neighborhood pizza shop I realized that if I just boiled a pot of water and cooked pasta and the broccoli in the same pot, tossed in some cheese and a few chili flakes I would have dinner. I did just that. It was happily devoured and we had enough left over for lunches today. No, there was no salad or anything else to go with it but there were satisfied bellies and my weary self was hardly any wearier for it. . .and actually I was rather pleased with myself.  Simple is satisfying, inexpensive and low effort and sometimes all that’s needed.

Simple Broccoli Pasta

Cauliflower, snap peas, asparagus and salad turnips would all be delicious instead of the broccoli.

Serves 4

6 cups broccoli, stems (peeled) and florets and cut into bite-sized pieces
1 lb stout pasta, like penne, fusilli or rigatoni
1 1/2 cups grated sharp cheddar or cheese of your choice or a combination of cheeses
Salt and freshly ground pepper
Pinch or two red pepper flakes
Splash of good olive oil

Bring a large pot of water to a boil. Add 1 tablespoon salt. Add the pasta and set a timer for 3-4 minutes less than the cooking time for the pasta. When the timer goes off,  add the broccoli to the pasta and cook for an additional 3-4 minutes or until both pasta and broccoli are tender. Scoop out save 1/2 cup of hot, starchy pasty cooking water and then drain everything well and put in a serving dish with the cheese, the reserved cooking water a good splash of olive oil and black and hot pepper. Mix well and taste and adjust seasoning with salt, pepper and/or oil.

People & Poetry

I’m in a funny stage of this breast cancer journey. I had my final surgery almost a week ago. All the signs indicate I’m doing well and am on a healthy trajectory. I had gotten quite strong leading up to the final surgery and am finding it challenging to manage yet another recovery period with limited mobility and activity. All that patience and mindfulness practice is well and good and yes, really useful, and yet I still get impatient and confused and sad at times about this whole complicated thing! And I’m so very tired of thinking about myself!

And then there’s poetry. And people! You people are something! I continue to be lifted up and comforted and made to laugh and ponder and embrace life in ways I never imagined possible. Your words are often the best poetry. This morning I bumped into a neighbor on my walk. I shared some of my post surgery worries vis a vis a class I am teaching today (with lots of help) and she simply said “You’re doing what you love and that is healing.”

Thank you, you wonderful people!

Any Morning
by William Stafford

Just lying on the couch and being happy.
Only humming a little, the quiet sound in the head.
Trouble is busy elsewhere at the moment, it has
so  much to do in the world.

People who might judge are mostly asleep; they can’t
monitor you all the time, and sometimes they forget.
When dawn flows over the hedge you can
get up and act busy.

Little corners like this, pieces of Heaven
left lying around, can be picked up and saved.
People won’t even see that you have them,
they are so light and easy to hide.

Later in the day you can act like the others.
You can shake your head. You can frown.

(CSA) Vegetables & Cancer

This was my version of this root vegetable slaw from the wonderful book Jerusalem by Yotam Ottolenghi.

Getting a cancer diagnosis was scary. It didn’t leave me with much band width to make major life-style changes. Those are hard enough to make when one is well! After the original shock subsided and a plan for treatment formed I began to realize just how lucky I was. I knew how to cook vegetables and had a steady source in the form of my CSA. I already loved vegetables, particularly cruciferous ones like broccoli, cauliflower, collard greens, cabbage and kale, which are noted for their cancer fighting properties. As I proceeded through many months of chemotherapy, followed by major surgery I was able to eat and often prepare for myself great quantities of vegetables. Luckily, all these veggies also tasted good during treatment, especially with plenty of added acidity and spice during the months of altered taste buds.


As I near the end of my treatments and regain strength and venture back out into my garden and sign up for my CSA (summer and winter) I am maybe more grateful than ever for farmers and farmworkers near and far. Farmers for whom the hard winters, storms, droughts and increasing climate volatility and fickle consumers and trends are not something managed by weather appropriate clothes or simple tweaks in business plans. The resilience, smarts and commitment farmers demonstrate day after day is staggering really. And the CSA–Community Supported Agriculture–model was designed in part to provide a little bit of stability in this volatile profession, providing $ up front so that farmers can plan for the season’s work and harvests in a way that involves the eater in a bit more depth. CSA is what has made me a better cook over the years and certainly what has inspired the increased quantity of vegetables enjoyed daily.


Hopefully most of us will not get cancer and will not think about vegetables primarily as a collection of nutrients with various properties but will enjoy them in all their beauty and deliciousness and cultural relevance and richness. However, it is nice to know that in addition to all that, enjoying them and knowing how to prepare them has many advantages for us and our loved ones, some of whom may need that extra boost today or some day in the future!


A special shout out to the CSA farms with whom I work, who subscribe to my Seasonal Recipe Collection so that their members can enjoy their weekly bounty to the fullest, with simple recipes and tips. Now is a great time to sign up and see what the season has in store for you!


47th Ave FarmSauvie Island OrganicsMinto Island GrowersLove Farm OrganicsFull Cellar FarmMud Creek FarmJoy Haven FarmLaughing Crow OrganicsHill Family FarmFarmer Joe’s GardensOlsen Communities CSAThe Good Earth Farm Full Plate FarmAmazing Heart Farm

Vegetables & Chocolate

I feel like a child experiencing things for the first time. We had family and friends over for my son’s birthday recently and I realized it was the first time in eight months that we’d had people over for dinner. I didn’t feel sick. I had a bit of hair on my head and yes those eye brows and eye lashes are coming back too! I wasn’t queasy. We didn’t really talk about this pathology or that chemo schedule. We just ate and laughed and it was simply wonderful.

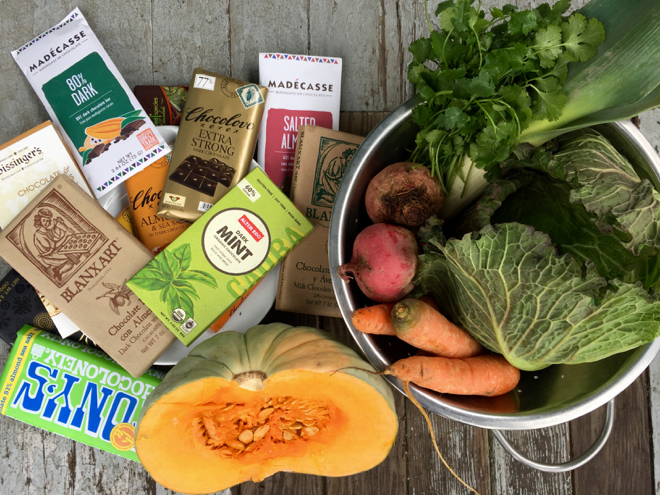
And speaking of eating, vegetables are still my big love but chocolate is a close second. The beautiful bars of dark chocolate, friends kindly dropped by, piled up for months while my taste buds were playing tricks on me. But no more tricks like that! Now my lunch trick is this: eat a lovely bowl of whatever vegetable, herb, bean, grain, sauce concoction I happen to have and then casually sort through said pile of chocolate and pick one and eat some, maybe lots of it! Life is good!

A Poem for Life

You Reading This, Be Ready
by William Stafford

Starting here, what do you want to remember?
How sunlight creeps along a shining floor?
What scent of old wood hovers, what softened sound from outside fills the air?

Will you ever bring a better gift for the world
than the breathing respect that you carry
wherever you go right now? Are you waiting for time to show you some better thoughts?

When you turn around, starting here, lift this new glimpse that you found; carry into evening
all that you want from this day. The interval you spent
reading or hearing this, keep if for life–

What can anyone give you greater than now,
starting here, right in this room, when you turn around?


I’ll check back in here after surgery. Love and light to us all!


Cook With What You Have


Facebook Instagram