Years ago my friend Margo had a piece of my mother’s chocolate pie I had hauled home from Thanksgiving. It was at least three days post Thanksgiving and custard pies do make the crust soggy eventually, but no matter. She was an instant convert and inquires about any leftovers annually. It’s still a winner and I actually kind of relish the slightly soggy, day-after (or day two or three-after) pie. My version is a bit more chocolatey than my mother’s but it’s still has that nice, pudding-y lightness to it. Oh I just can’t wait for next week!
Wishing you all a very happy, delicious and peaceful Thanksgiving!
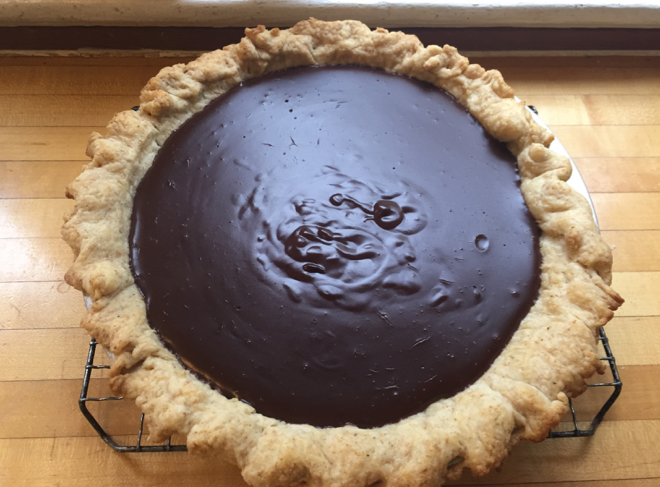
Chocolate Pie
My mother has been making a version of this pie for decades, as did my grandmother. It’s not very sweet (only 1/3 cup sugar in the whole thing) and nice and chocolaty. It really does come together quickly and it’s always a favorite at the Thanksgiving table, and the day after!
1 single crust pie, serves 8 +
½ a recipe of the below pie dough or your preferred dough
Filling:
1/3 cup cornstarch
1/3 cup plus 1 tablespoons sugar, divided
3 tablespoons unsweetened cocoa powder
1/4 teaspoon salt
3 cups whole milk
2 ounces bittersweet chocolate (about 60% cacao), finely chopped
1 teaspoon vanilla extract
1 cup chilled heavy cream
Roll out dough on a lightly floured surface with a lightly floured rolling pin into an 11-inch round, then fit into a 9-inch pie plate. Trim edge, leaving a 1/2-inch overhang, then fold overhang under and crimp edge decoratively. Prick bottom and side of shell all over with a fork, then chill shell 15 minutes in freezer. While shell chills, preheat oven to 375°F. Butter a piece of foil and press it butter-side down into the unbaked shell and cover the bottom with pie weights or dry beans.
Bake on baking sheet until pastry is set and edge is pale golden, about 20 – 25 minutes. Carefully remove weights and foil, then bake shell on baking sheet until pale golden all over, 15 to 20 minutes more. Cool shell.
For pudding filling, whisk together cornstarch, 1/3 cup sugar, cocoa powder, and salt in a 2-quart heavy saucepan, then gradually whisk in milk. Bring to a boil over medium heat, whisking constantly, then boil, whisking, for about two minutes (mixture will thicken). Remove from heat and whisk in chocolate and vanilla until smooth.
Pour filling into cooled shell and chill until cold, at least two hours. Just before serving, beat cream with remaining 1 tablespoon sugar until it just holds soft peaks. Spoon onto pie and garnish with bittersweet chocolate shavings, if you’re feeling fancy.
Pie, without whipped cream, can be chilled up to one day before serving. Whipped cream is best added at the last minute, however, it holds up pretty well even with the cream.
Basic Pie Crust
–adapted from ChezPim.com
I swear by this crust technique and ingredients—flour, salt, butter, water. It has an extra step but the results are worth it and after a time or two it becomes routine.
For flaky pastry dough; enough for two 9″ rounds, for top and bottom pie crust, or two tarts:
250 g (2 1/4 cup) all purpose flour or 100 grams whole wheat pastry flour and 150 grams apf
Scant ½ teaspoon fine sea salt (or use salted butter and skip the extra salt)
225 g (1 cup/2 sticks) cold butter (salted if you’d like and then omit the salt above)
60 ml (1/4 cup) cold water
Measure the flour and salt and dump it onto your clean countertop. Cut the sticks of butter into slices ¼-inch thick and spread them out on top of your pile of flour. Toss the chunks so they are coated with flour.
Now, press the butter into the flour with the heal of your hand: the left one if you’re right handed, and vice versa. With your right hand holding the pastry scraper, scrape up some of the flour and butter and flip it over the pile. Keep pressing and scraping until the butter becomes thin flakes pressed into the flour. Keep working until you see more butter flakes than loose flour. If your butter flakes are really big, break them up a little bit, you should end up with a combination of big flakes and some crumbs.
Make a well in the middle of the pile and pour the 1/4 cup of water into it. Now, working quickly, use your finger tips or the bench scraper to gently blend and distribute the water evenly into the dough. Then, scrape up the dough again with the pastry scraper and press it into a somewhat cohesive lump of dough. Gather it into a ball of sorts–it’s fine if it’s quite crumbly–and wrap tightly with plastic and let rest in the fridge for 20-30 minutes.
After 30 minutes, remove the dough from the fridge and unwrap it. Flour the counter. Place the dough on the board and lightly flour the top of the dough as well. With a rolling pin, roll the dough out to an elongated rectangle. It will be crumbly and may only stick together in patches, which is just fine. Pick up one end of the rectangle, fold it 2/3 of the way in, as best as possible, again lots of crumbs are fine. Then pick up the other end and fold it over that section. Now you have a dough that is folded more or less into thirds. The dough will crack and might even break, don’t worry about it.
Turn the folded dough 90 degree so that the seams are now on the sides, roll the dough out again into a rectangle, and repeat the folding again. You will see that the dough will become smoother and more pliable. You can repeat this process once or twice more – I usually do it three times altogether.
What you’re doing here with the rolling and folding is working the dough a little bit to build the strength so that it is not so fragile when you roll it out later. (Especially if you’re going to make lattice top, you’ll find this dough easy to work with.) You’re also creating very thin layers or butter and flour, much like in puff pastry, so the dough becomes extremely flaky once baked.
Once you’ve done your three folds, or however many you want to do, roll the dough into a smaller rectangle. Cut it in half and shape the two resulting pieces roughly into rounds. Wrap with plastic wrap and refrigerate for up to 3 days or freeze, wrapped in a freezer bag, for 3-4 months.


Susan Piper says:
This sounds really messy, but I might have to try it. My grandmother used shortening for her pie crust. She would roll out her crust roughly, spread a thin layer of cold shortening on it and fold the rough edges to the inside in fourths. Then she would roll it out. She made terrific pie crust that way. I don’t use shortening now that we know how unhealthy it is. I’ve had good luck mixing vodka in with the water.
cookwithwhatyouhave says:
It is a bit messy at first but once you get the hang of it, it’s really quite simple, but yes, the technique is a bit unusual. Let me know how it goes.
Daniela says:
Schön euch heute getroffen zu haben. Ich dachte ich habe Deine email Adresse aber leider hab ich nichts gefunden. Diese Torte schaut super lecker aus! Muss ich mal ausprobieren. Vielleicht meldest Du dich via email?
Happy Thanksgiving, Daniela
Debbie D says:
I tried the crust for my pumpkin pie this year and it was hands down the best crust I’ve ever made and one of the flakiest and tastiest I’ve had. Thank you for sharing!
cookwithwhatyouhave says:
I’m not sure I’ll ever make another. So glad you liked it!
Gail Shaloum says:
Do you think this could possibly be converted to a vegan recipe? Vegetable shortening for crust, non-dairy milk, maybe coconut cream whipped, or no whipped cream on top?
cookwithwhatyouhave says:
Yes, I think it could and that your substitutions are good ideas. I think using some (full fat) coconut milk in the pudding itself will give it nice richness and yes, a little whipped coconut cream on top would be lovely.