Blog

Too Much To Say & Two Recipes

I’ve been wanting to write a post about my recent trip to NYC for Slow Food, my upcoming pizza class; the wedding cake I made this summer; the annual Deumling Goat Roast (you have to scroll down a bit on this link for the photos); what’s in my freezer and why; how I source my products; why cooking is as much art as science,  . . . .And instead of any of those I’m going to write about what I made for dinner last night. I’ll eventually cover the above topics (though you might have to remind me) but I felt compelled to write about last night’s dish and the process of making it because it seems that the last-minute, creative, sometimes-under-duress kind of cooking that I often talk about is of interest.

I had an exhilarating but long weekend of teaching and often the Monday after I have little inspiration left. I am a bit under the weather too and didn’t know what to make. It had to be quick and couscous is by far the fastest starch in my pantry. I had one big, beautiful tomato, some summer squash (which I quickly diced and sautéed) and feta so I figured all together that would be a good start.

Then I remembered some hard-boiled eggs in the fridge from a few days ago and the basil that needed picking in the backyard. I made a very lemony dressing with garlic, a bit of hot chili pepper, black pepper and good olive oil and within about 15 minutes total I had a lovely, fresh, light meal in a bowl!

And I have to admit I was being casual with my measurements and did not stick to the 1 cup of couscous to one cup of liquid rule and used more water. At first I feared the couscous would be too gummy once I started fluffing it with a fork, however, after a few minutes left uncovered and fluffed some more it was just fine. The dressing was perfect and the occasional salty, tangy bites of feta and rich bites of egg made for a nice, summery combo. At the end I decided it needed a bit more heft and sliced up a frozen Italian pork sausage, quickly fried it and added that to. My husband was concerned this ad-hoc dish might suffer from what we somewhat disdainfully refer to as ingredient pile-up, but luckily it did not and each ingredient added something relevant. So, whether or not you make this as described or use it as inspiration to combine whatever you have on hand, is immaterial. The fun part, for me at least, is coming up with something delicious even when I don’t feel like cooking and haven’t planned a thing. And if any of you know of a source for whole wheat couscous please let me know. I’ve heard such a thing exists but have not tracked it down!

And since you have to read this whole post to get a sense of this “recipe” I’m going to give you another one that I’ve been making and teaching a lot of late. It’s another perfect and fairly quick summer supper from the ever clever Mark Bittman. I’ve changed his recipe for Tomato Paella just a bit by omitting the oven step and just do the whole thing on the stove top. Works perfectly and avoids heating up the kitchen on a summer night (not that we’ve had much heat to begin with!) And I imagine you could add a handful of shrimp and/or clams during the last few minutes of cooking, cover the pan, and steam those, for a slightly more authentic paella.

Happy Cooking and Eating!

Food as Gift

This topic warrants at least half-a-dozen posts but to at least start this favorite topic of mind, here’s what I have going on today. I should preface this by explaining that I’m going to NYC for a very quick trip planned just last week for some Slow Food USA board work. This trip has inspired quite the variety of food-as-gift and food-in-trade scenarios.

First of all, I have lots of beautiful lettuce that is going to bolt soon. And I have basil, which did ultimately survive the wet spring and is now prolific. While I’m out-of-town I don’t think my husband will have time to put this to use so I offered it up on Facebook. My neighbors weighed in first so they’re going to get it.

Secondly, I have a limited wardrobe these days. Three-and-a-half years of raising a kid and working from home, in the garden and kitchen, does not make for a New York City meetings and dinners kind of wardrobe.  However, I have a great summery dress that I rarely wear  and I finally figured out that it’s just a bit too long. So, my wonderful neighbor Bev who is an accomplished seamstress fixed this problem for me last night. So she gets Yogurt Panna Cotta with Apricot Compote this evening in exchange.

The third food-as-gift endeavor involves baking a batch of my new favorite cookies which will be split three ways 1) my host and dear friend Gail in Brooklyn, 2) the fabulous Slow Food USA staff, and 3) and my husband and son.

Fourth, today a friend migrated all my data from my ancient and dying computer to my new (refurbished), shiny laptop for me. This will promptly result in a meal plus dessert upon my return.

My first forays into cooking involved giving it as a gift and I got hooked on the pleasure of creating something edible to share or give away. My mother, who as you know, influenced my approach to food and cooking in innumerable ways, always brings a tin of cookies to meetings. So as I finish this post in mid-air, flying past Mount St. Helen’s with two cookie tins at my feet, I am grateful for the gift of food.

Time Well Spent & Salade Nicoise

When I was growing up I often woke up to the smell of frying onions and bacon wafting up the stairs, and not in an American-breakfast-hash-sort-of-way but in a German-Zwiebelkuchen-sort-of-way. Zwiebelkuchen is kind of a cross between pizza and Quiche with lots of sautéed onions, bacon and cheese. It’s a great dish to feed lots of people, keeps well, etc. So my mother, always needing lots of food for our household, started early while she was also making breakfast.

Other days she’d have a lentil soup simmering away while we were heading off to school. So the idea of getting a jump-start on dinner in the morning has often been part of my routine too. These days I’ve been hard boiling eggs and cooking potatoes and green beans in the morning so that I can throw together a Nicoise Salad in a few minutes at night. The warmer weather has inspired more cold suppers and one of my favorites is a pasta dish with a raw tomato sauce (just blanch a few tomatoes, peel them and whizz in the blender with 2 handfuls of basil and 4 tbs of olive oil and salt) that you toss with room temperature pasta and diced fresh mozzarella. So I cook the pasta in the morning, toss it with olive oil and it’s ready for the sauce and hungry boys in no time.

There are infinite ways to split up the dinner cooking whether you start the night before while cleaning up dinner or the next morning. And I feel downright smug sometimes when I sneak steps in that way.

You can make a pesto or other sauce in the morning and cook the starch in the evening or cook some rice in the morning and toss with a vinaigrette and fresh veggies at night. You get the drift.

So, here’s the Nicoise recipe and a link to my August classes in which we’re cooking fabulous summer fare like this.

Nicoise KD
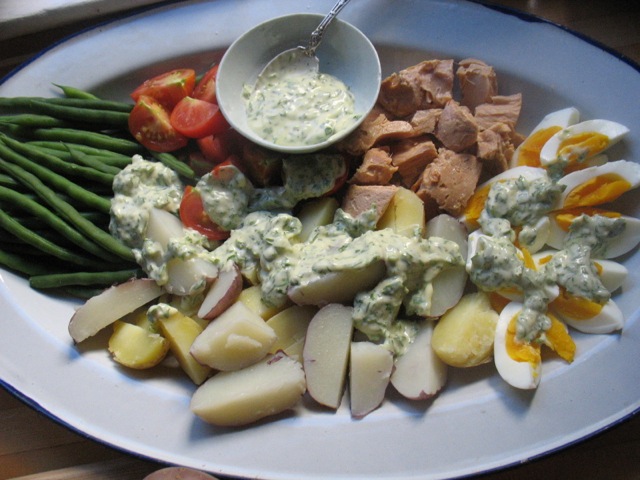
My version of a Salade Nicoise, with a creamy dressing–and not lettuce or olives. It’s a great idea to adapt to your taste and what you have on hand.

Salade Nicoise

I have adapted this classic composed French salad to my tastes over the years so this is not entirely authentic but very delicious and one of my favorite summer dinners. It’s a complete meal and beautiful to boot. As usual, please use the quantities as a guide. They are approximations and I vary them depending on how much of what I have on hand. There are very few hard and fast rules about this. And all of the components keep and are wonderful the next day so don’t worry about making too much.

3 waxy, firm fleshed potatoes (anything but russets), scrubbed and cut into large chunks or left whole if you have time (they cook more quickly if they’re cut up)

2 medium tomatoes, cut into wedges or a handful of cherry tomatoes

½ lb of green beans, tipped

3-4 hard-boiled eggs, sliced in half

5 oz of canned Tuna (Oregon Albacore is wonderful, low in mercury, and available at many local farmers markets, at New Seasons, Pastaworks, etc.)

1 handful of cured olives

Cook the potatoes in salted water until tender but firm. Remove potatoes from water and let them cool. You can cook the green beans in the salted potato water so don’t throw it out. Add a bit more salt to the water and bring back to a boil and then toss in beans and cook for 4-5 minutes until tender but not mushy. The flavor of cooked green beans is much better (in my mind) when they are fully cooked and no longer “squeaky” but certainly not mushy.

Dressing

½ cup of either basic homemade mayo or aioli

1 teaspoon finely chopped fresh thyme

1-2 tablespoons capers, rinsed well and finely chopped

1 tablespoon finely minced onion or shallot

1 teaspoon Dijon-style mustard

1 teaspoon or more, lemon juice or white or red wine vinegar.

a few teaspoons of warm water or milk/cream for thinning down the mayo

freshly ground, pepper

Mix all ingredients together well. Adjust seasoning to your taste with more lemon, salt, or pepper. If you don’t have any mayo on hand the traditional Nicoise calls for a vinaigrette so substitute the mayo in the above recipe for 1/3 cup of good olive oil and add more vinegar or lemon juice.

On a large platter arrange the potato chunks, green beans, eggs, tomatoes, olives, and tuna. Drizzle everything generously with the dressing and serve.

Summer at the Beach and a new Technique

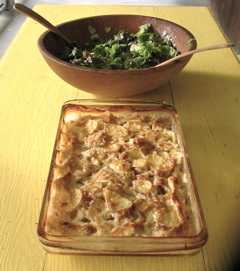
Try as I might, I did not manage to write a post last week. We had our annual family beach week and though I took my laptop, not much work transpired. But I did cook and bake–cherry pie, soba noodles with a cilantro and ginger dressing, pancakes with raspberry syrup . . . and these fabulous scalloped potatoes!

Scalloped potatoes are kind of an old-school dish I think. My grandmother made them all the time (she topped hers with a layer of little pork, breakfast sausages:) and I grew up making them-sans sausages-with my mother. In fact they were one of the first dishes I made for my family for dinner all by myself when I was about 10. I remember it distinctly because I was in a bit of a black pepper phase. I ground so much pepper on each layer of potatoes that it verged on inedible. My family was gracious about it but that pepper phase lasted a couple of years.

So, I’ve always layered potatoes with whatever herbs, cheese, veggies, or spices I was using at the time. However this last week at the beach, wanting to spend more time  reading in the hammock, I scrapped the layering and just tossed everything in a big bowl, put the mixture in the baking dish, added milk half way up the potatoes and baked it. Voila! Don’t know why this just occurred to me! It was just as delicious as always and much faster–actually better I think because the flavors were more evenly blended. Now I’m going to use this technique for other gratins, using summer squash and I don’t know yet what else, but I’m excited to experiment.

A friend recently lent me Mark Bittman’s Kitchen Express. It’s a wonderful book of quick meals and what I like most is that his recipes are written in a paragraph or two with no long lists of ingredients and detailed instructions. The subject of recipe writing and how much detail to give warrants a whole post but in short, I would like to think that with some dishes, describing the process with approximate quantities give the cook more freedom and license to use whatever he/she has on hand and to taste and experiment along the way.  Cooking can be very fun this way and in my quest to get people cooking more often, it’s an important part of demystifying the process and getting people to think about what they really like and how they might turn that into dinner every night. It really can be simple, fast, delicious and fun.

Scalloped Potatoes

Scrub and thinly slice (by hand, slicer on a box grater, or food processor) about 2 1/2 – 3  lbs of waxy potatoes (not Russets, all other kinds work well) and put in a large bowl. In a small bowl mix about 1/4 cup of flour, 2 + teaspoons of kosher salt, a few grinds of black pepper and whatever other seasonings you like. I used 2 1/2 teaspoons each ground cumin and pimenton (smoked Spanish paprika) and 1/2 teaspoon chili flakes. Grate some sharp cheddar, gruyere or other cheese of your choice. Finely dice a small onion.

Mix the flour spice mixture with the potato slices and toss well with your hands. Add the grated cheese and onions, toss again. Spread mixture in a 9 x 13 baking dish, pat down a bit with a spatula. Pour milk (or broth/stock of some kind) about half way up the potatoes. Sprinkle the top with a bit more grated cheese and bake at 400 degrees until potatoes are tender and easily pierced with a fork about 45 minutes. Finish under the broiler for a minute or two if the top isn’t well-browned.

Variations include lots of chopped herbs like parsley, marjoram, chives or oregano, diced bacon or slices of sausage, minced garlic, finely chopped greens or peppers, etc.

And on a completely different note, I have to include this photo of the blissful, beach week! Happy cooking and eating and reading everyone!

Beautiful, Abundant, Forgiving. . .

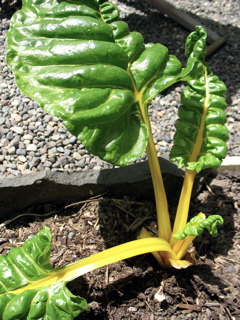
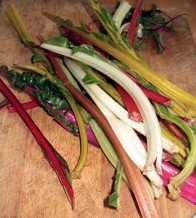
. . . and delicious! The wedding cake! Yes it was but that’s for the next post! I’m really talking about Chard, Swiss Chard. Much less sexy but much more practical. Chard is a workhorse of a vegetable and solved my dinner conundrum tonight. I have four plants in the garden and pick a generous bunch at least once a week.

Unfortunately my red chard plants just started bolting so I have less of a rainbow situation now but the white and gold ones are still beautiful.

Chard keeps in a plastic bag in the fridge for at least a week. It’s easy to cook and equally delicious braised for a longer period of time to bring out all its sweetness or quickly sautéed.

In tonight’s iteration I turned it into “Daddy Patties”, so named by my niece for my brother. Not sure why, but the moniker has stuck. Call them what you will, they are a hearty, delicious meal usually devoured by non-greens-loving adults and children with glee, as well as by us greens-lovers!

I had a heel of stale bread to use up today and was a bit lazy and just cut the bread into rough pieces. I love the flavor and texture of the bigger bits of bread in the patties but it does make the patties harder to fry and  flip as they break up more easily. They taste just as good but aren’t quite as beautiful.

My mother used to serve these with rice and a tomato sauce. I don’t usually take the time to make a sauce but it’s a great combo. I serve them with a dollop of Greek yogurt or sour cream or just plain or with a salad on the side.

2 bunches greens (chard, beet greens, spinach, kale, collards or any combination of these)

2 eggs

½ – 1 cup grated cheese (cheddar, swiss, gouda, asiago, parmesan (use the smaller amount if you’re using a hard cheese like parmesan, etc.)

1 cup larger, roughly torn bread crumbs or 1/cup more finely ground ones (or if you don’t have bread/bread crumbs you can  use 3 Tablespoons of cornmeal in the batter instead)

a pinch or two of chili flakes (optional)

1/4 teaspoon nutmeg (optional)

salt

pepper

oil for pan frying

Wash and coarsely chop the greens. Cook them in ½ cup or so of water in a large sauté pan or pot for a few minutes until they are tender (for kale or collards the cooking time will be a bit longer, but not much). Drain well and squeeze out most of the moisture and chop the greens again. Beat the 2 eggs in a large bowl, add salt, pepper, chili flakes and nutmeg (if using), grated cheese and bread crumbs. Mix in greens. Taste for salt.

Heat a cast iron or other large skillet with a tablespoon or so of olive or safflower oil. When hot spoon  about large spoonfuls of the mixture into pan and pat down with a spatula to flatten. Flip after a few minutes when the underside is golden brown. Cook a few minutes more and serve. They keep warm and hold up nicely in a 250 degree oven.

Salt your Food!

It’s too beautiful out to spend much time at the computer. At long last it feels like summer has arrived. One of my dearest friends is getting married this weekend here in Portland and I think her arrival in town has brought out the sun. Margo is also the person for whom I’m making the wedding cake that I may or may not have mentioned here but will get a full post once it’s completed and happily devoured.

The two salts I use: Diamond Crystal Kosher and a Portuguese "Flor de Sal", a very good sea salt.

Now to salt . . . . Much has been written recently about salt and several recent posts on the ever informative Culinate.com have useful links and commentary. Much of this debate was started by a panel appointed by the USDA which is making the case for more stringent crackdown on salt.

The key distinction, which many of the current articles make, is that processed food is jam-packed with salt and ever more so. This recent NY Times piece gives you all the dirty details. But I want to refer you to this wonderful piece I also just discovered on Culinate which sums up my salt mantra which I give at the beginning of each of my cooking classes. I start my spiel with: “The difference been mediocre food and good food is  salt.” It’s not quite that simple but almost, so read the piece and find out and then go out and play in the sun, then come in make a quick salad or soup or frittata with all the beautiful produce we have, salt it well and enjoy!

P.S. The sea salt I use–for salad dressings, finishing dishes, etc.–is available at Pastaworks.

P.P.S. I had two very fun cooking classes this last week and will share a recipe or two from these soon! If you can’t wait, some of them are posted on Sauvie Island Organic’s blog. You have to scroll down a bit, but I’m there!

Why I Like Vegetables

Fava Beans

Last night I did something I haven’t done for a long time. I puréed vegetables in order for my son to eat them. He has plenty of teeth mind you (he is 3 years old!) and capacity to chew so that was not the reason. For the last week or so, we’ve relapsed into the negotiations over vegetables and I was simply tired of it. I sautéed onions, carrots, chard stems and added a bunch of collards and some veggie broth. Then I pureed the whole thing, added it to a small batch of cream sauce and baked it with pasta and a bit of cheese for a very-veggie-heavy “mac-n-cheese”. He devoured two bowls full with a grin on his face and asked me to be sure and save some for him for after school today and not send ALL of it to work with Daddy!

Why did I feel so compelled to do this? I love vegetables and I don’t like days without them. I probably love vegetables in part because I grew up eating them and watching my mother grow them. And they’re so beautiful. I also did this because I want my son to be healthy and strong and well-nourished and I’m convinced deep down in my soul that having good vegetables everyday is a part of that.  And I know that he likes vegetables but somehow those green and orange pieces would otherwise have been meticulously eaten around and left in the bowl – unless we’d launched said negotiations which tend to end with the promise of dessert!

But I digress, my point is that vegetables matter–flavor, nutrients, variety, color, cultural markers, history, beauty, and more flavor! I’m grateful for the variety and quality of vegetables surrounding me in my garden, my CSA share, the farmers markets and in some of our grocery stores. And that  makes me grateful to our many local farmers, who have not had an easy go of it this spring. When my broccoli is devastated by cabbage worms and my basil and peppers succumb to slugs, I’m frustrated but I still get my CSA every week and the markets are still abundant. But in order for that to be the case, so much creative energy, knowledge, skill and hard work is applied to those fields every day and for that, I am the most grateful.

And while last night’s pasta dish was perfectly fine, I don’t think any of you need the “recipe” so instead I’m going to direct you to this week’s blog post from Sauvie Island Organics in which I’m the featured “chef” and there you will find six new recipes to put all these wonderful veggies to use.

Happy Cooking and  Eating!

P.S. Summer Cooking Class Schedule at Cook With What You Have!

Salad, Salad, Salad. . .

Say (curse, shout, whine, cry) what I will about this unbelievably rainy spell we’ve had, the lettuces and greens are glorious and bountiful. We have salads every night these days, the greens picked minutes before dinner. They are tender, sweet and addictive. Right now I have lots of arugula (not going to seed nearly as quickly as usual), mache (also known as corn salad, lamb’s lettuce or Feldsalat) and red oak leaf, and variety of green lettuces.

And speaking of salads and before I forget, my next cooking class is Saturday 6/19 and will feature salads (and a guest chef!) and other fabulous dishes. Still spots left – sign up at Cook With What You Have!

A few nights ago the salad needed to be the main gig for dinner. I had hard-boiled a few eggs earlier in the day since I like to have them on hand. I had some lovely  new carrots from my CSA and a few beets. I scrubbed them well and without peeling either–I gave up peeling carrots years ago but more recently have quit peeling beets too, unless less their on the big side when the skin can get a bit tough–cut the carrots on the bias into nice chunks, the beets into small wedges and spread them out on a sheet pan. I sprinkled them generously with salt and olive oil and roasted them in a hot oven (425) for about 20 minutes until tender and slightly caramelized around the edges.

Meanwhile I washed and dried the greens, roughly chopped 3 hard-boiled eggs and made a dressing. Dressing was green garlic finely minced (of which I also have a lot in the garden and since I want the garden space for other things I’m pulling it all up now), fresh thyme, dijon-style mustard, lemon juice, salt, pepper, olive oil and a few teaspoons of my reduced apple cider. More on that later.

I tossed the greens with the roasted veggies, eggs and dressing and we sat down to a meal of this beautiful salad and warm cornbread muffins made extra good with sharp cheddar, chives and some chili flakes in the batter. Cornbread recipe to follow soon. And if you can’t wait, it’s an adaption of a recipe from Michael Ableman’s Fields of Plenty.

It was the perfect late spring dinner . . . at least my husband and I thought so. My son ended up eating a deconstructed version that looked like this:

Try as I might, dressed green salads have yet to enter his repertoire.

On a final note, it is supposed to dry out and warm up, albeit after yet another few days of rain, so next week I’ll have a pizza recipe, yes, with greens for you all!

Happy Cooking and Eating!

I Stared Down the Fridge and I Won!

I picked up this phrase from a dear friend and tonight was my night and I did win! I rarely write two blog posts in one week but this one couldn’t wait. And believe it or not, it all starts with Swiss Chard stems.  I have used a lot of chard lately, the leafy part that is, which meant I had collected a good pile of stems in the fridge. They keep well and I just kept adding to the bag. So tonight, in need of dinner, what did I find in the fridge? Chard stems (and not much else)! I usually either dice them and add them to soups or sauces but have also made a gratin in the past, so that’s what I set out to do. It really needed to serve as the main dish tonight so here’s how it turned into something blogworthy.

I roughly chopped half an onion and the chard stems and sautéed those in olive oil for a few minutes. Then I added 1/2 cup of water and covered the pan and braised them for about 10 minutes until the stems were tender.

Then I made a quick bechamel, but for the first time ever used half milk and half veggie bouillon (yes, I know you’re probably tired of hearing about the stuff but it is transformative). Then I remembered that I had a bag of leftover, sliced baguette in the freezer. So out came that and I nearly killed my food processor but I processed those into uneven, biggish, bread crumbs. Then I toasted those with just a little olive oil over high heat to thaw and crisp up just a bit.

Then I added about 1/4 teaspoon of freshly grated nutmeg to the bechamel and grated some sharp cheddar. Oh and I added the liquid left in the chard pan to the bechamel.

Then I put the chard stems in a casserole dish, covered them with bechamel, then bread crumbs, then cheese. In the oven at 400 for about 20 minutes until nice and bubbly, finish under the broiler and voila! Dinner! It was so much more than the sum of its parts. It was delicious–savory, creamy, crunchy, earthy! We did have an arugula salad (thanks Elizabeth – my super gardener friend/neighbor) too.

Oh and since I’m not writing the recipe out in a formal manner, the bechamel was made as follows: Melt 4 tablespoons of butter in a saucepan, add 4 tablespoons of flour, whisk and cook over medium heat for 2-3 minutes. Add 1 cup of milk and 1 cup of veggie  bouillon, first heated up together in a separate  saucepan or microwave. Whisk in the hot liquid and cook over medium heat until thickened, about 7-10 minutes. Add nutmeg.

Buon Appetito!

Radishes, Rain & Summer Classes

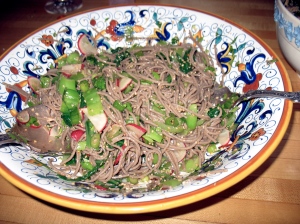
It’s wet. It’s so wet here we’re back to wearing rubber boots at the park. My tomato plants look as cranky as I am about this though my potato plants seem to be growing 2 inches per day and the chard and salad greens are thriving.  And I’m doing my best to disregard that thermometer and rain gauge, knowing summer is just around the corner. . . . A soba noodle salad I taught in class this last weekend is also helping counter the gloomy weather. And it’s the perfect foil for all those veggies that are thriving in these conditions–radishes, tender young greens, and peas. And I think it will take well to other veggies as the season progresses, like zucchini, green beans, etc. A friend also just sent me a recipe for Braised Radishes which I haven’t made yet but will this week. It sounds intriguing and like a great way to use those lovely red roots (as my son calls them)

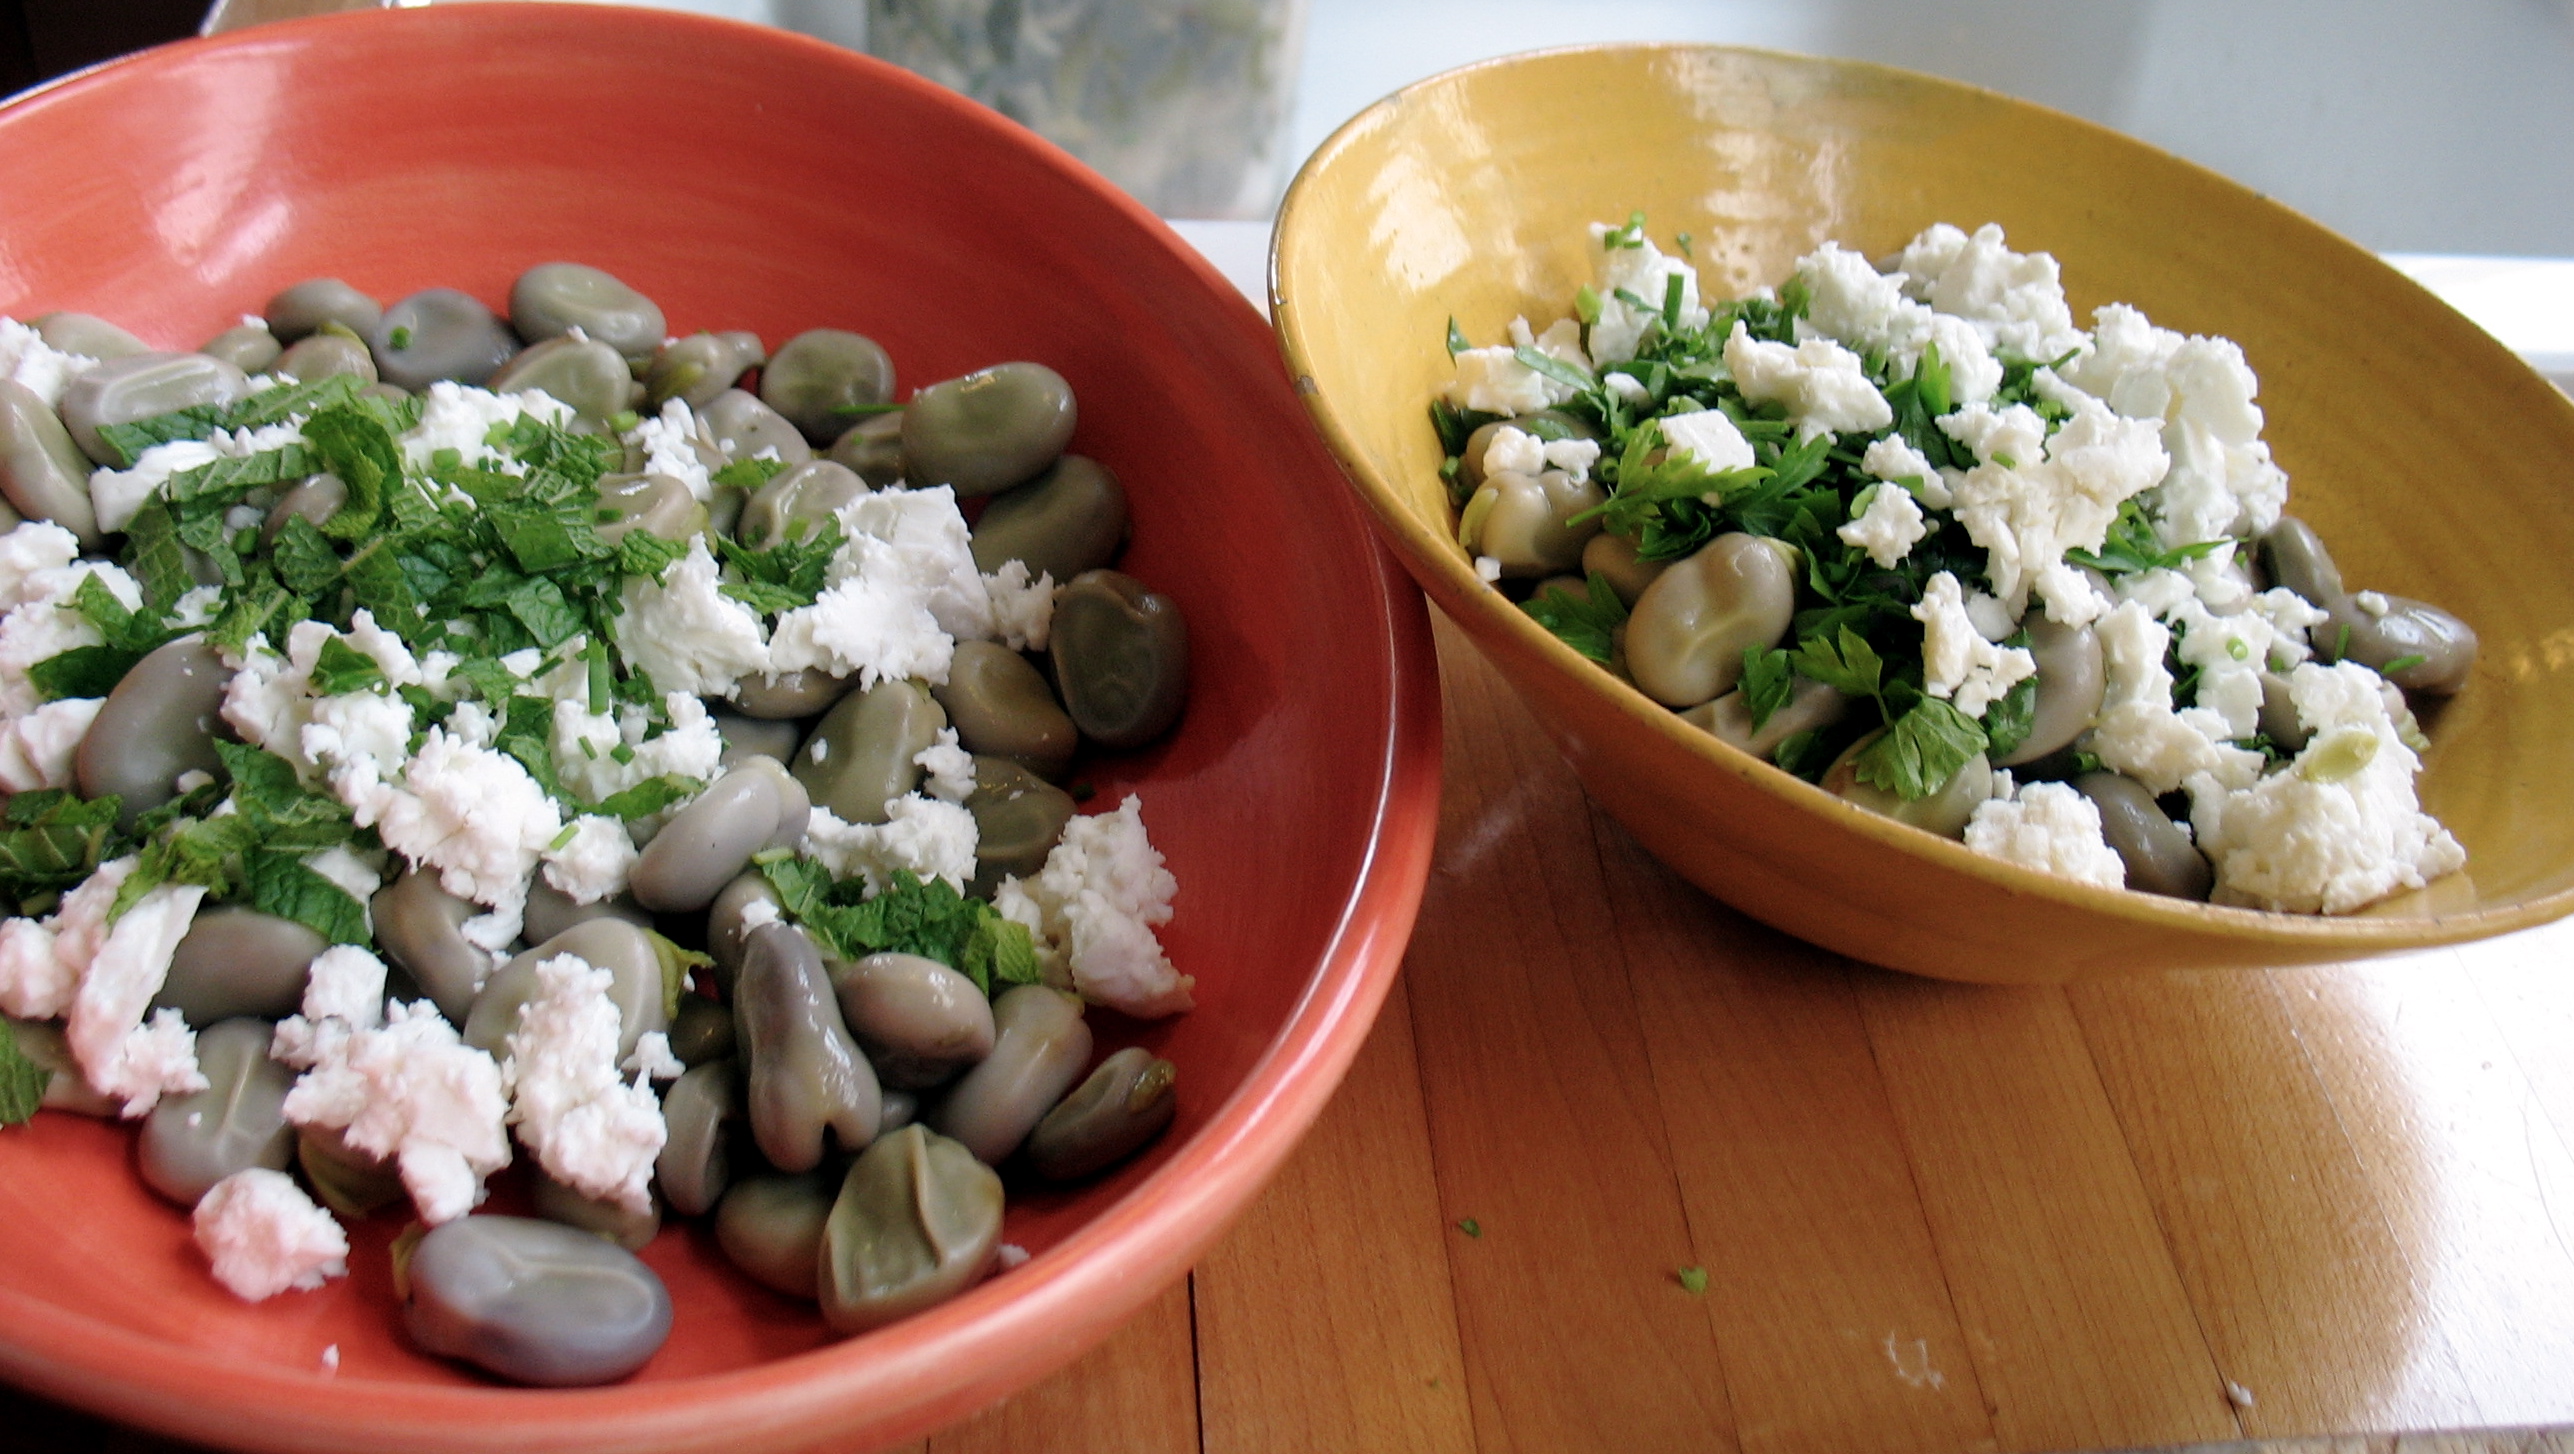
And speaking of the season progressing, I’ve had lots of fun planning my classes for the summer. They are posted at CookWithWhatYouHave.com. So if you’d like  new ideas for peas, favas (a simple, kind-of-life-changing method in which you don’t have to peel each bean!), new potatoes, berries, peppers, eggplants, tomatoes, sweet onions, . . . come take a class.  I’ve also left enough times open this summer in case you’d like to schedule a private class/party with a specific menu. Finally, I’ve recently had some requests for a pie-baking class, and gluten-free classes. Let me know if you’re interested in either!

Asian Noodle Salad with Toasted Sesame Dressing

— Adapted from Feeding the Whole Family by Cynthia Lair

1 (8-ounce) package soba noodles (or whole wheat spaghetti – Barilla is a good brand for these)

¼ cup sesame seeds

¼ cup chopped cilantro

1 large or two small heads of bok choy, (or 1 bunch beat greens, young mustard greens, chard or most any other green) washed and cut into ½ inch ribbons

6 radishes, scrubbed and cut in half and then thinly sliced

2 tablespoons toasted sesame oil

3 tablespoons tamari (or regular soy sauce)

3 tablespoons red wine vinegar

1 tablespoon maple syrup or honey

couple of pinches of chili flakes (or more depending on your taste) or 1/2 tsp chili oil

Cook soba noodles according to package directions. About 3 minutes before the noodles are done add the chopped greens to the noodles, bring back to a boil and cook for a few more minutes. Drain and rinse noodles and greens in colander.

Toast sesame seeds in a dry skillet over medium heat. Keep seeds moving until they give off aroma, pop, and begin to brown. Remove and set aside. They burn easily so watch carefully.

Mix dressing ingredients in large bowl, add noodles, greens, radishes and cilantro. Mix well.

You can also add grated carrot, scallions, or choose to cook a different vegetable with the noodles such as broccoli, green beans, peas, etc.

Improvisation

Sunday was beautiful. The weather has finally turned warm here and we were all hanging out on a neighbor’s stoop Sunday evening. I had planned to make Barley Risotto with Asparagus (still trying to make that Barley Asparagus combo work!) and had actually measured out the broth, cleaned and sliced the asparagus and measured out the barley earlier in the day. Well now I found myself on said stoop with a beer in hand and children happily playing and just couldn’t tear myself away and head inside. So I stayed on the stoop, sampling said neighbor’s fresh bread with butter.

My son "Improvising" . . . since I don't have a photo of the improvised dinner I figured this would have to do!

When I finally tore myself away from the convivial, summer neighborhood fun I knew that the three-year-old, now over-hungry, was not going to wait for risotto. And I had a pastry-chef friend coming over to sample/critique a sample wedding cake after dinner so . . .What is the quickest cooking grain? I think it’s quinoa so that’s what was made. I basically treated it like I would have the rice (sans slowly adding broth and stirring) and we had ourselves the most delicious quick quinoa/risotto. I’m definitely going to repeat this technique and try other veggies as well.

Needless to say I did not remember to take a photo of the prep or the finished dish, so my son doing his version of improv it is!

Quick Quinoa “Risotto” with Asparagus

This technique is actually more like Spanish Rice than Risotto but whatever you want to call it, it’s worth trying.

1/2 medium onion, diced

1 slice of bacon, diced (optional)

1 bunch of asparagus, tough ends snapped off, and cut diagonally into 1-2 inch pieces

1 1/2 cups quinoa, rinsed and drained

handful of grated parmesan or other hard cheese

3 cups veggies broth or stock (I used my homemade Veggie Bouillon)

olive oil

Heat broth in a small pan. Saute onion and bacon in large saute pan with 2 Tbs of olive oil until onion is translucent and soft. Rinse quinoa well and strain thoroughly. Add quinoa to onions and bacon and saute for a few minutes until dried out and slightly toasty over high heat. Add broth all at once. Bring to a boil, turn down to simmer and cover. After about 10 minutes spread asparagus over quinoa and cover again. Cook until quinoa and asparagus are done–about 3-4 minutes. Add parmesan and some more good olive oil and mix well. Voila!

P.S. I still have a few spots in this Saturday’s Cooking Class on Hearty One-Dish Salads and meal with Grains and Beans and lots of Veggies. It’s a fabulous class! Check it out and sign up if you’re interested.

Garden vs. Computer

I’ve been trying my best to write a blog post this morning. It is Tuesday which means blog post day. But then I remembered that I needed to check the planting calendar in my go-to gardening book Growing Vegetables West of the Cascades by Steve Solomon and then I thought I’d better see if the spot I had in mind for summer squash was actually big enough. . . I get carried away in my little garden and tend to plant things too close together, forgetting year after year how gigantic squash plants get.  And then I saw some weeds that needed pulling, flowers that needed dead-heading, flowers that would make a lovely bouquet, arugula that needed thinning. . . . An hour later I’m back.

Typing away I notice that my hands are starting to look like my mothers’–a little cracked, with dirt embedded in them that no amount of washing will quite remove.  As I child I was often given the choice between “indoor chores” and “outdoor chores”. For  years I chose indoor, exclusively! I hated the feeling of dirt on my hands, especially as it dried and cracked. I hated pulling weeds. My mother lived in her garden and I just didn’t get it. Now I get it! I just want to be out there, pulling those weeds, sowing beans, digging in the compost, watching the volunteer sunflowers pop up everywhere. I love it!

Arugula and Mache Thinnings

Reflecting on this progression in my life is liberating as a parent when my son shows no interest in things I love or excessive interest in things I don’t. When I asked him  yesterday what I should write my blog post about today ( he’s 3), he said: “Chainsaw movies!”. He likes to watch logging videos on youtube (his uncle owns a sawmill, hence the obsession), which is what he means by chainsaw videos. Not that I don’t like chainsaws but they don’t inspire me.

Anyway, I’m going to wrap this up so I can get back outside. However, I’ll share a recipe for a crisp that I cobbled together (inspired by Heidi Swanson of 101cookbooks yet again) on the fly a few nights ago.

Strawberries for a future crisp!

Strawberry Rhubarb Crisp

Note: If you don’t have any port don’t worry, but it does add a lovely dimension.

Preheat oven to 375.

2-3 cups rhubarb, sliced in 1/2 inch chunks

1 1/2 – 2 cups whole strawberries, cut in half

1/2 cup sugar

1 tablespoon cornstarch

2 tablespoons Port (or 2 teaspoons good balsamic vinegar if you don’t have port)

For Topping:

3/4 cup whole wheat pastry flour

2/3 cup ground almonds (I use my little Zyliss cheese grater for this or you can pulse them in the food processor)

2/3 cup of rolled oats

scant 1/2 cup sugar

1/2 tsp kosher salt

6 Tbs butter, melted

Mix sugar and cornstarch in a small bowl, sprinkle over fruit and mix well. Add port, mix again and place in 9 x 12 baking dish.

Mix dry ingredients well in medium bowl. Stir melted butter into the dry ingredients and combine well with a spoon or with your fingers. Some dry spots will remain which is fine. Cover fruit with topping and bake until the fruit is bubbling and topping starting to brown, about 45 minutes.

Serve warm with whipped cream.

The Comfort of Good Food – Lentil Soup and Carrot Cake

After a recent weekend of teaching classes and non-stop planning, cooking, and shopping in preparation therefor, I found myself completely uninspired on the cooking front. Maybe it was the let down of completing a big project and the need for my mind to take a break. . . luckily it only lasted a few days. And luckily a neighbor stopped by with Madhur Jaffrey’s tome World Vegetarian during the middle of my slump.

A quick side note about neighbors. As I have always found, people like to talk about cooking and food and eating.  We all eat and we all feel strongly about some aspect of that piece of our lives and whether it’s my neighbors or new facebook friends or folks commenting on my blog or my relatives or long-lost high-school friends, everybody has something to say about food. Every walk through the neighborhood ends up in conversations about a new discovery of how to make nut-butters; whether a focaccia recipe will turn out well as a regular loaf and if yeast quantities should be adjusted; a discussion about whether one prefers thick or thin asparagus; or about why children eat three servings of lentil soup one day and refuse it the next. Such walks and conversations pull me right out of any, temporary funk!

Now back to cookbooks and recipes. Just browsing Jaffrey’s enormous book made me smile and want to spend all day cooking again. I have not managed to make anything out of  it yet  but did order it and look forward to incorporating her recipes in many of  my classes. Now to the things that I did make and that were immensely satisfying:

I made both of these dishes this week (an unseasonably cold-week!)  for the first time and both have been added to the favorite/go-to list. And they are both from the same book Feeding the Whole Family by Cynthia Lair, though I made some changes to both.

French Lentil and Potato Stew

–Adapted from Feeding the Whole Family by Cynthia Lair

1 Tbs olive oil

1 onion, diced

1 tsp ground cumin

t tsp ground coriander

1 teaspoon freshly grated ginger

1/8 tsp cayenne (or more if you like spice)

1/4 tsp cinnamon

1 teaspoon turmeric

1 tsp salt (omit if you’re using salted stock or bouillon)

black pepper

3 medium potatoes, cubed

1 stalk celery, diced

1 carrot, chopped

1 1/4 cups French green lentils (or regular brown ones if that’s what you have)

5 cups water or veggie or chicken stock (use homemade veggie bouillon if you have it)

1 bunch chard or spinach (collards, kale, beet greens. .. ) washed and chopped

squeeze or two of lemon juice

Heat olive oil in a 4-quart pot on medium to medium-high  heat. Add onion, carrot and celery and saute until softened. Add all spices and saute a few more minutes.

Add potatoes, lentils and water (or stock/bouillon). Bring soup to a boil. Reduce heat and simmer, covered for 45 – 55 minutes until the lentils are almost creamy. About 10 minutes (or less for spinach) before the lentils are done add the greens. Taste for salt and adjust to your taste. Finish with a squeeze or two of lemon juice. If you have Greek yogurt or sour cream on hand, garnish each bowl with a dollop.

Carrot Cake with Maple Cream Cheese Frosting

–Adapted from Feeding the Whole Family by Cynthia Lair

I turned to this book for dessert ideas that are on the healthier side of things. I bake so much and love sweets and I figure I should temper all the sweet stuff with this kind of cake that uses honey and whole wheat flour. I expected it to be much less decadent than it was. I just ate twice as much of it, knowing how healthy it was. Oh the mind games!

Cake:

1 1/4 cup whole wheat pastry flour

1 tsp baking soda

1 tsp sea salt

1 tsp ground cinnamon

1/4 tsp ground cloves (optional)

1/2 cup butter

1/2 cup honey

2 eggs

1 generous cup grated carrot (I grated half the carrots on the biggest holes on my box grater and half on the smaller ones – liked the combo)

1 Tablespoon lemon zest

1 1/2 tsp lemon juice

1/3 cup currants

1/3 cup golden raisins, roughly chopped (regular raisins would be fine too) and if you like nuts in your carrot cake, by all means add some chopped walnuts or whatever you have

Preheat the oven to 350. Lightly oil and dust with flour a 9-inch cake pan. Mix flour, salt, baking soda and spices in a mixing bowl; set aside.

Melt butter and honey over low heat. add eggs and lemon juice and whisk together. Add wet ingredients to dry mixture and mix well.

Fold carrots, zest, currants, and raisins. Pour batter in pan and bake for 25-30 minutes. be careful not to over bake.

Frosting:

6 oz cream cheeses

1/4 cup (4 Tbs) of butter, room temperature

2-3 Tbs maple syrup

1/2 tsp lemon juice

Cream the butter and cream cheese together with a wooden spoon. Add maple syrup and lemon juice. Add more of either to taste. The frosting will firm up in the fridge if it gets to soft to spread but mine worked just fine.

Frost top and sides of cake!

Food & Community

Chard and garlic in my back yard garden

I tend to mention farmers’ markets in every other blog- or facebook post. Now it’s time to talk about CSA’s – Community Supported Agriculture. My CSA share will be starting in a few weeks and some in the area are already up and running and a few even go year-round. I can’t wait for mine to start. It’s like Christmas every week.

CSA is a farming operation which gives the farmer much needed cash at the beginning of the season when folks sign up and pay for a share of the harvest (produce, herbs, eggs, flowers, etc.) throughout the growing season, and subscribers get a box of whatever is at its peak every week. For all the details on CSAs and a comprehensive list of all the choices check out the Portland Area CSA Coaltion (PACSAC).

I love CSAs for a variety of reasons (in random order): 1) I love the surprise and beauty of opening that box every week and seeing my “treasure.” 2) I love not thinking about what to buy. 3) The CSA model fits perfectly with my cook-with-what-you-have strategy and in fact helped inspire this way of cooking. 4) The quality is unsurpassed since it is always the freshest most perfectly ripe items. 5) I actually spend less on produce when I have my CSA since I go to the farmers’ markets just to supplement with berries, etc. (since I can’t stay away from the markets even if I have plenty of produce at home!). 6) I feel connected to that farm, the crops/varieties,  people, weather challenges, etc. in a more intimate way.

Ornamental strawberries in my back yard

If not knowing what produce you’re going to get every week makes you nervous instead of happy then farmers’ markets might be a good bet. However, there are also good ways to slowly work your way into CSAs if the model, convenience, price point, idea, etc. appeals to you. It’s easier to pick up a box or have it delivered than make your way to a market sometimes (although there are so many markets now that it’s awfully convenient too). You can begin by splitting a share with a neighbor or friend. That way you won’t be overwhelmed with produce and can get in the swing of things and build your confidence and skills in cooking that way (by taking classes from me, among other things:) and eventually graduate to a full share (or keep sharing with your neighbor or plant your own little veggie garden).

Chives, oregano, and alpine strawberries in my garden

A friend of mine and extraordinary farmer Josh Volk of Slow Hand Farm offers very small shares. This is the  perfect “gateway” CSA. And the produce is so delicious that the simplest of preparations are the best. Josh details the crops and amounts of each item you’ll receive in your share in great detail on his site. Just spending a few minutes on Slow Hand Farm’s website I learned so much about what’s growing and why, what we can look forward to, and what this erratic-but-fairly-typical-weather means to someone who isn’t just worried about getting wet walking from the office to the bus stop.

So I invite you to explore some of these farms and their offerings (if you aren’t already a CSA subscriber) and see what you find.

Forgive the lack of recipes in this post. I will post again tomorrow with a recipe!

Note: Since I don’t have any photos of local CSA farms I’m including photos from my own little garden in this post. And I currently have enough parsley, thyme, oregano, winter savory, and sage for the whole neighborhood so if you’re in need of any of those stop by and I’ll happily share!

Eggs Poached in Tomato Sauce, Organic Ag, Raj Patel, etc.

Raj Patel wrote the book Stuffed and Starved: The Hidden Battle for the World Food System. I have only read excerpts of the book but have recently subscribed to his blog and am eager to read the whole book. One of his most recent posts is about a study comparing the energy it takes to run a conventional farm vs. an organic one. Questions of how best to feed the world are immensely complicated and Raj doesn’t shrink from these complications. Having coincidentally tuned into a debate on npr on my way to the airport the other night (to pick up another worthy-of-following food figure Bryant Terry) about whether organic food is just marketing hype, I was particularly interested to look at the study Raj discusses and its massive amounts of data.

Subscribing to Raj’s blog has been a welcome addition to my more strictly food/cooking blogs (with the exceptions of Michael Ruhlman who regularly interjects food system/policy related rants (his word!) into his posts and Culinate).  When you spend as much time as I do cooking, testing recipes, planting and tending a vegetable garden,  shopping at local farmers’ markets, and just living in one of the “bread baskets” of the world, it is sometimes easy to lose sight of the challenges we face locally, nationally and globally when it comes to food, food-security, access to real food, . . .

All this to say that I am trying to find a balance between being totally immersed in the details of cooking and teaching with an awareness, no more than an awareness, maybe tactics to infuse a bit of the challenges of our food-system into my work. Whether that means teaching free classes to Portland Farmers Market shoppers who use their Oregon Trail cards (starting in May)  and really making simple, local ingredients shine in all my classes, I am going to continue thinking about ways to  advance a healthier more equitable food system.

Now to the recipe! And speaking of local and organic, eggs are one of those things (like tomatoes) where once you’ve had a good egg–fresh, local, bright yellow/orange–it’s hard to go back to grocery store eggs. And speaking of food system challenges. .. figuring out how to make good eggs like this accessible to much of the world should be at the top of someone’s agenda. Eggs are such a little miracle of deliciousness, protein, nutrients of all kinds, and adaptability.

I taught this recipe in class this weekend to rave reviews. This dish is sometimes called Eggs in Purgatory but whatever you call it, just make it!

Eggs Poached in Tomato Sauce with Salsa Verde

Basic Tomato Sauce

2 Tbs extra-virgin olive oil

1/2 medium onion, 1/4-inch dice

2 garlic cloves, peeled and minced

1 1/2 teaspoons chopped fresh thyme leaves, or 1 tsp dried

1/2 medium carrot, finely chopped (optional)

1 (28-ounce) can peeled whole tomatoes, crushed by hand and juices reserved

Salt & pepper

In a 3-quart saucepan, heat the olive oil over medium heat. Add the onion and garlic, and cook until soft and light golden brown, about 8 to 10 minutes. Add a few pinches of salt and the thyme and carrot, and cook 5 minutes more, until the carrot is soft. Add the tomatoes and juice and bring to a boil, stirring often. Lower the heat and simmer for about 30 minutes until as thick as hot cereal. Season with salt and pepper. This sauce holds 1 week in the refrigerator or up to 6 months in the freezer.

4-6 eggs (depending on number of people and/or appetite)

salt & pepper

4-6 Tbs Salsa Verde (recipe below)

Toasted bread

Heat tomato sauce in a wide sauté or frying pan until bubbling, turn down to medium/medium high. Make slight indentations in the sauce with a spoon and crack eggs into indentations. Sprinkle generously with salt and a few grinds of pepper, sprinkle on the parmesan (if using) and cover the pan. Cook until the eggs are cooked to your liking—about 5 minutes for typical poached egg quality.

Serve with toasted bread and Salsa Verde on the eggs.

Salsa Verde

There are many variations of this simple sauce. Vary it as you like but start with a couple of handfuls of parsley, chopped. Add salt, pepper, lemon juice, minced garlic and olive oil to desired consistency and taste. It doesn’t take much garlic so start with half a small clove. It should be strongly seasoned since it is used with mild dishes but the garlic can easily overpower things. You can add chopped capers or anchovies as well but for the poached eggs I think the simpler one is best.

This sauce is also wonderful over roasted root vegetables, over a hash of veggies and /or potatoes, with fish or beef.

Asparagus

Asparagus has arrived at the farmers’ markets here in Portland. In an attempt to work Asparagus into my upcoming “One-dish Grains and Beans” class I promptly overdid it. I made a warm salad of pearled barley, asparagus, feta, parsley and chives with a lemony vinaigrette.  Judging from my husband’s face as he ate I knew instantly that this was not going to be taught in class next weekend.

The mediocre Asparagus Barley Salad

It was fine, acceptable dinner fare, but it prompted a conversation with him and then on facebook about when to keep things simple. I am usually a big fan of simplicity and I think asparagus shines, with some exceptions, in simple preparations. So class will feature an asparagus risotto (which I consider one of the exceptions).

I clipped an asparagus recipe from the Oregonian’s FoodDay section years ago for braising asparagus with rosemary and bay leaves. I never would have thought to flavor asparagus with these herbs but it’s extraordinary and it falls squarely in the simple category. This is what I’m going to make with my second bunch of asparagus tonight.

Note: I have neither a rosemary bush nor a bay tree in my yard but both exist in great splendor on my block and both of these plants produce way more than a dozen families could consume. So, look around your neighborhood if you don’t have your own and see what you can find. And you’ll meet some new people in the process . . .

I can’t manage to find a link to that recipe so here goes:

Asparagus Braised with Fresh Rosemary and  Bay Leaves

16 plump spears fresh asparagus
1 tablespoon extra-virgin olive oil
1 teaspoon coarse sea salt
several sprigs fresh rosemary
several bay leaves, preferably fresh

Rinse the asparagus and break off the tough ends. In a skillet large enough to hold the asparagus in a single layer, combine the  oil, asparagus, salt, rosemary sprigs and bay leaves. Sprinkle with several tablespoons of cold water. Cover. Cook over high heat just until oil and and water mixture begins to sizzle. Reduce the heat to medium and braise the asparagus, turning from time to time, just until the asparagus begins to brown in spots, 8-10 minutes (depending on the thickness of the asparagus). Serve immediately.

— From Vegetable Harvest by Patricia Wells

And speaking of the Oregonian, there’s an interesting article in FoodDay today about radical homemakers with profiles of some local folks. However radical (or not) you might be, the idea of cooking more at home and spending time with your family growing, procuring and making food, can be an awfully fun and certainly delicious way to spend time.

P.S. There is one spot left in my One-Dish Grains and Beans class on Sunday, April 25 so sign up if you’d like! And I promise there won’t be an barley with asparagus.

Cooking for New Parents

I will never forget the meals that were delivered to our doorstep more than three years ago when our son was born. Miraculously they just kept arriving. I remember many of these meals in great detail and the joy of eating them. I particularly remember the giant box my friend Ellen brought. She had made not one, but two meals. There were warm cookies and a bouquet of daffodils. I thought I had died and gone to heaven.

As you know I cook–I am a fast cook, I like to cook, I’m not daunted by cooking. However, as everyone told me, I was completely unfit and unable to cook right after Ellis was born. I don’t think I really cooked for the first six weeks. It seems so hard to imagine now but babies, and particularly first babies I imagine, are all-consuming, especially for the mother who usually is nursing what seems like all the time. I remember a day when a banana peel sat on the counter all day because I never managed to get it into the compost bucket!

One of my dearest friends just had a baby and today is my day to cook for her and her family. I’m not sure  I’m going to muster two meals but a hearty one it will be. I just made the Turnip and Turnip Greens Soup putting to use those sweet, tender, and bright white turnips that are gracing our markets at the moment. The greens are fresh and wonderful to incorporate in this soup. It is spring  in a bowl!  I add a few squeezes of lemon juice and a couple of tablespoons of heavy cream at the end. And I use my homemade Veggie Bouillon instead of chicken stock, but otherwise I follow this recipe from Culinate.com closely.

I am also just made a savory bread pudding with lots of herbs, carrots, onions, chard, and extra sharp cheddar. It’s good warm or room temperature. It keeps well and will be a rich and hearty accompaniment to the soup. So maybe it will turn into two meals after all.

And since I prefer meals with dessert and nursing mommies need all the calories they can get, there will also be a quick jam tart that I read about on one of my favorite blogs, Smitten Kitchen, this morning.

I had intended to work today–as in plan class menus, review my marketing plan, organize finance stuff, edit my website–however, since I’ve chosen cooking as my line of work, I think I AM working today. And I can’t think of anything I’d rather be doing.

Rhubarb Yogurt Cake

I make this cake every spring when rhubarb starts showing up in the farmers’ markets and now also in my very own garden.

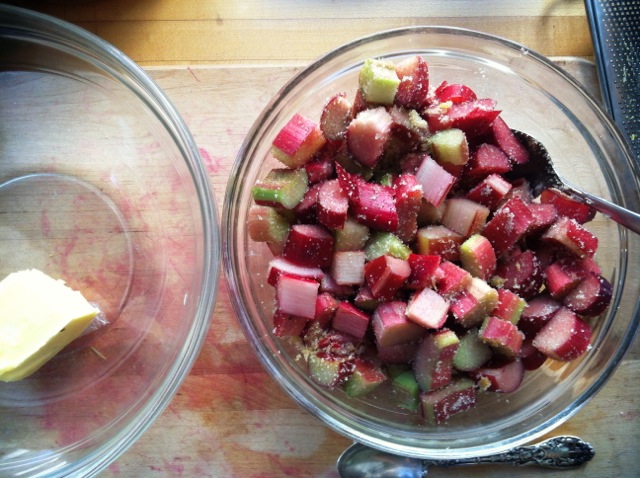
rhubarb sliced for yogurt cakeRhubarb Yogurt Cake (adapted from my cousin Mary Lane)

This cake is not very sweet so if you like sweeter desserts I would add a few tablespoons of honey or maple syrup in additional to the brown sugar.

4 cups rhubarb, sliced thinly
1/4 cup butter (softened if you have time but not necessary)
1 1/2 cups brown sugar (loosely packed)
Grated zest of 1/2 an orange or 1 lemon (skip if you don’t have on hand)
1 egg
1 teaspoon vanilla
2 cups all-purpose flour (or 1 cup whole wheat pastry and 1 cup all -purpose)
1 teaspoon baking soda
3/4 teaspoon salt
1 cup whole-milk yogurt

Preheat oven to 375. Butter a 9 x 13 cake pan.

Cream butter with a wooden spoon, add zest and sugar and cream together until well blended. Whisk in egg and vanilla, add flour, soda and salt and finally yogurt and then rhubarb until mixed. Do not over mix. Spread batter in prepared in pan and bake until golden around the edges and tester comes out clean about 25 minutes. It will seem a bit soft but firms up as it cools.

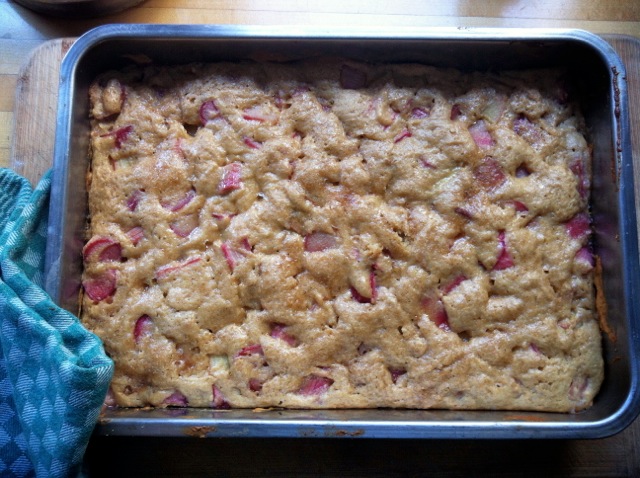
rhubarb yogurt cake


Serve as is or with lightly sweetened whipped cream if you’d like.


Celebrating Mothers and Daughters & Homemade Mayo

I was born on Mother’s Day. I joke with my mother that I don’t need to give her a gift as long as I’m still around. And my mother always says, “All I want is a hug and maybe a piece of chocolate cake.” I added the latter – she doesn’t actually say that but I think that’s what she would love to have, in addition to that hug.

As you might recall from previous posts, my mother is also my biggest culinary influence. She is the original “cook with what you have” cook. And she does it with style and for a dozen people on the fly practically weekly. She also lives 13 miles from the nearest grocery store. And she has the most bottomless and varied of all chest freezers (all home-grown too)– far better than most stores!

I don’t know about you, but it’s not always easy cooking with other people and in other people’s kitchens. And my mother, who is a very fast and efficient cook, does not always love sharing her kitchen with others. But whenever I’m at her house I inevitably cook and we have such a seamless rhythm together in the kitchen and she never fails to note how much she loves to have me in the kitchen. I’m sure it’s that we’ve worked side-by-side in kitchens for 30 +  years but it still seems noteworthy that it’s such fun.

We do have our culinary disagreements, particularly about what constitutes properly cooked meat and fish. She’s more of well-done type! And she doesn’t quite see the point of stocking two different kinds of olive oil: one for finishing dishes, salad dressings, etc. and one for sauteeing and such. But beyond that, we’re pretty similar. We just cooked Easter dinner together and I have to admit, even though the leg of lamb was more done that I would have chosen, it was very good.

So I think we should celebrate mothers and daughters for the whole month of May this year and I’ve scheduled a class on Sunday, May 16th for you mothers and daughters who would like to spend a few hours in my kitchen with each other and cook together. And if you’d like a private class with another mother/daughter pair or two either in my kitchen or yours we’ll schedule something!

And speaking of spring and Easter and Mother’s Day. … home-made mayonnaise season has started in my house! It is actually never really not in season, it’s just that now that my chives, oregano and parsley are prolific in the garden I love it even more. We had fried razor clams the night before Easter and dipped them in herbed mayo; last week we ate it with sweet potato fries (made with lime juice and cilantro), and this week it will go in the egg salad (using up all those easter eggs).

Homemade Mayonnaise with Fresh Herbs

2 egg yolks (organic or from a local farm if possible)

1 -2 tsps lemon juice (plus possibly a bit more to taste at the end) or white wine vinegar in a pinch

Couple of pinches of kosher salt

Freshly ground pepper

3/4 – 1 cup or more of safflower oil or canola or some neutral vegetable oil

Herbs you have on hand (good with chives, parsley, basil, chervil, tarragon, etc.)

Whisk egg yolks with lemon juice and salt and pepper. Then very, very gradually start pouring in the oil in a very thin stream, whisking as you go. After you’ve incorporated about 1/4 cup of oil you can start speeding things up a bit. Continue until you have a consistency you like. It will get thicker and stiffer the more oil you add. Add chopped herbs at the end and add more salt and/or lemon juice if it needs more tang.

Aioli

To make the classic French garlicky mayonnaise (aioli), mash as many cloves of garlic as you want (you can start with as few as two and go up to about 10 for a very spicy, strong aioli) with some coarse salt with the side of a chef’s knife (or in a mortar) until you have a fairly smooth paste. Add the garlic paste to the egg yolks, lemon juice and salt and proceed as with the mayo above. Typically aioli does not have fresh herbs in it but sometimes I add some chives or parsley or basil. And traditionally you would use olive oil for this but I find that it often gets too bitter and strong if you use 100% olive oil so I suggest you use half very good-tasting extra virgin olive oil and half sunflower or some other more neutral oil.

Homemade Veggie Bouillon

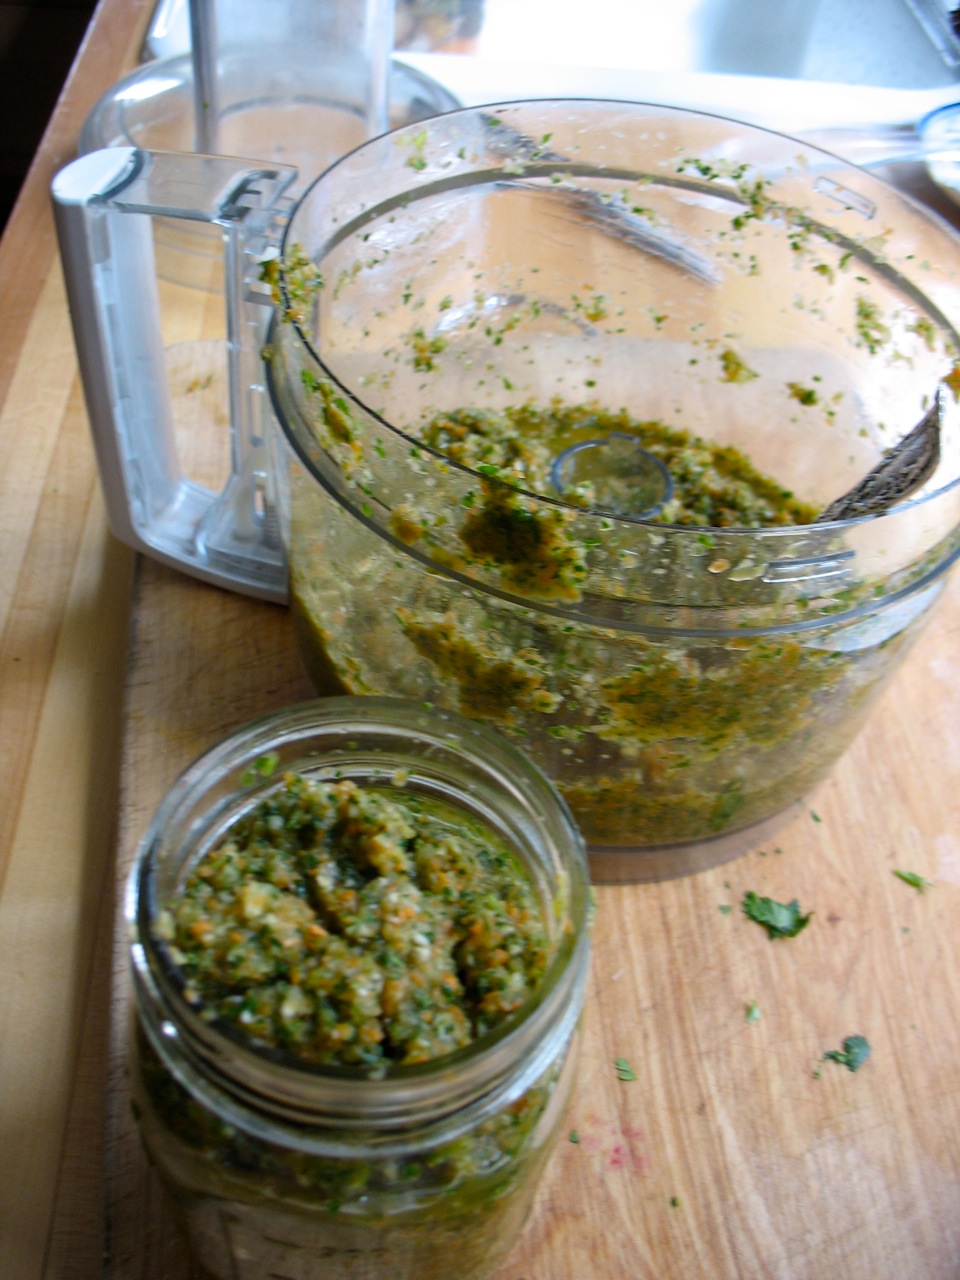
Homemade Veggie Bouillon base. Dissolve 1-2 teaspoons per cup of water for a delicious instant broth for soups or with which to cook grains, etc.

One of my favorite blogs is Heidi Swanson’s 101 Cookbooks. She blogged about this basic and brilliant idea of making your own bouillon paste in a matter of minutes.  I’ve taught it in countless cooking classes and sent folks home with a jar to keep in the freezer for that last-minute risotto, soup, braise, etc. If you have a food processor, all you do is clean the appropriate veggies (carrots, onions, leeks, parsley . . . .) and process them until they are very finely chopped, add lots of salt, process again and spoon into a jar. Done! Nothing is cooked or sautéed. I do love veggie stock but this method of processing things raw gives a wonderful fresh, bright flavor and is quick to make and easy to store and use. When you need the broth, just spoon out about 2 teaspoons of bouillon per cup of water (or more or less to your taste) and use in your respective dish. I used it soups, instead of water or stock, in risotti, to cook grains, etc.

Homemade Bouillon

This recipe requires a food processor. If you don’t have all the below ingredients you can just use onions, celery, carrots and parsley and you can vary the ratios of the vegetables too. Just be sure to use about 1/3 cup salt for each 2 cups of finely blended veggies/herbs.

5 ounces leeks, sliced and well-washed 
(about 1 medium)
7 ounces carrot, well scrubbed and chopped
 (about 3-4 medium)
3.5 ounces celery
 (about 2 big stalks)
3.5 ounces celery root (celeriac), peeled and chopped (about a 3” x 3″ chunk)
1 ounce sun-dried tomatoes
 (about 6 dried tomatoes)
1 large shallot or a 1/4 of smallish onion, peeled
1 medium garlic clove
6 ounces  sea salt or kosher salt (scant 1 cup)
1.5 ounces flat-leaf parsley, loosely chopped
 (about 1/3 of a good-sized bunch)
2 ounces  cilantro (coriander), loosely chopped (about ½ bunch)

Place the first four ingredients in your food processor and pulse about twenty times. Add the next three ingredients, and pulse again. Add the salt, pulse some more. Then add the parsley and cilantro. You’ll want to stir up the mixture occasionally in order to integrate it all and create a smooth paste.

You should end up with a moist, loose paste of sorts. Put the past in a quart container or jar and freeze for use over the next few months. Because of all the salt it remains scoop-able directly from the freezer.

Start by using 1 1/2 – 2 teaspoons of bouillon base per 1 cup, and adjust from there based on your personal preference.

Inspired by The River Cottage Preserves Handbook by Pam Corbin. The U.S. edition of the River Cottage Preserves Handbook will be available this summer.